Posts

floor sanding Melbourne

How to Sand Concrete Floors: 8 Easy Steps for a Smooth Finish

Concrete holds a long history in the construction world. From 6500 BC Nabataean Kingdom and Egyptian pyramids to modern high-rise buildings and highways, we can find it everywhere.

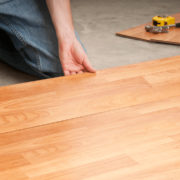
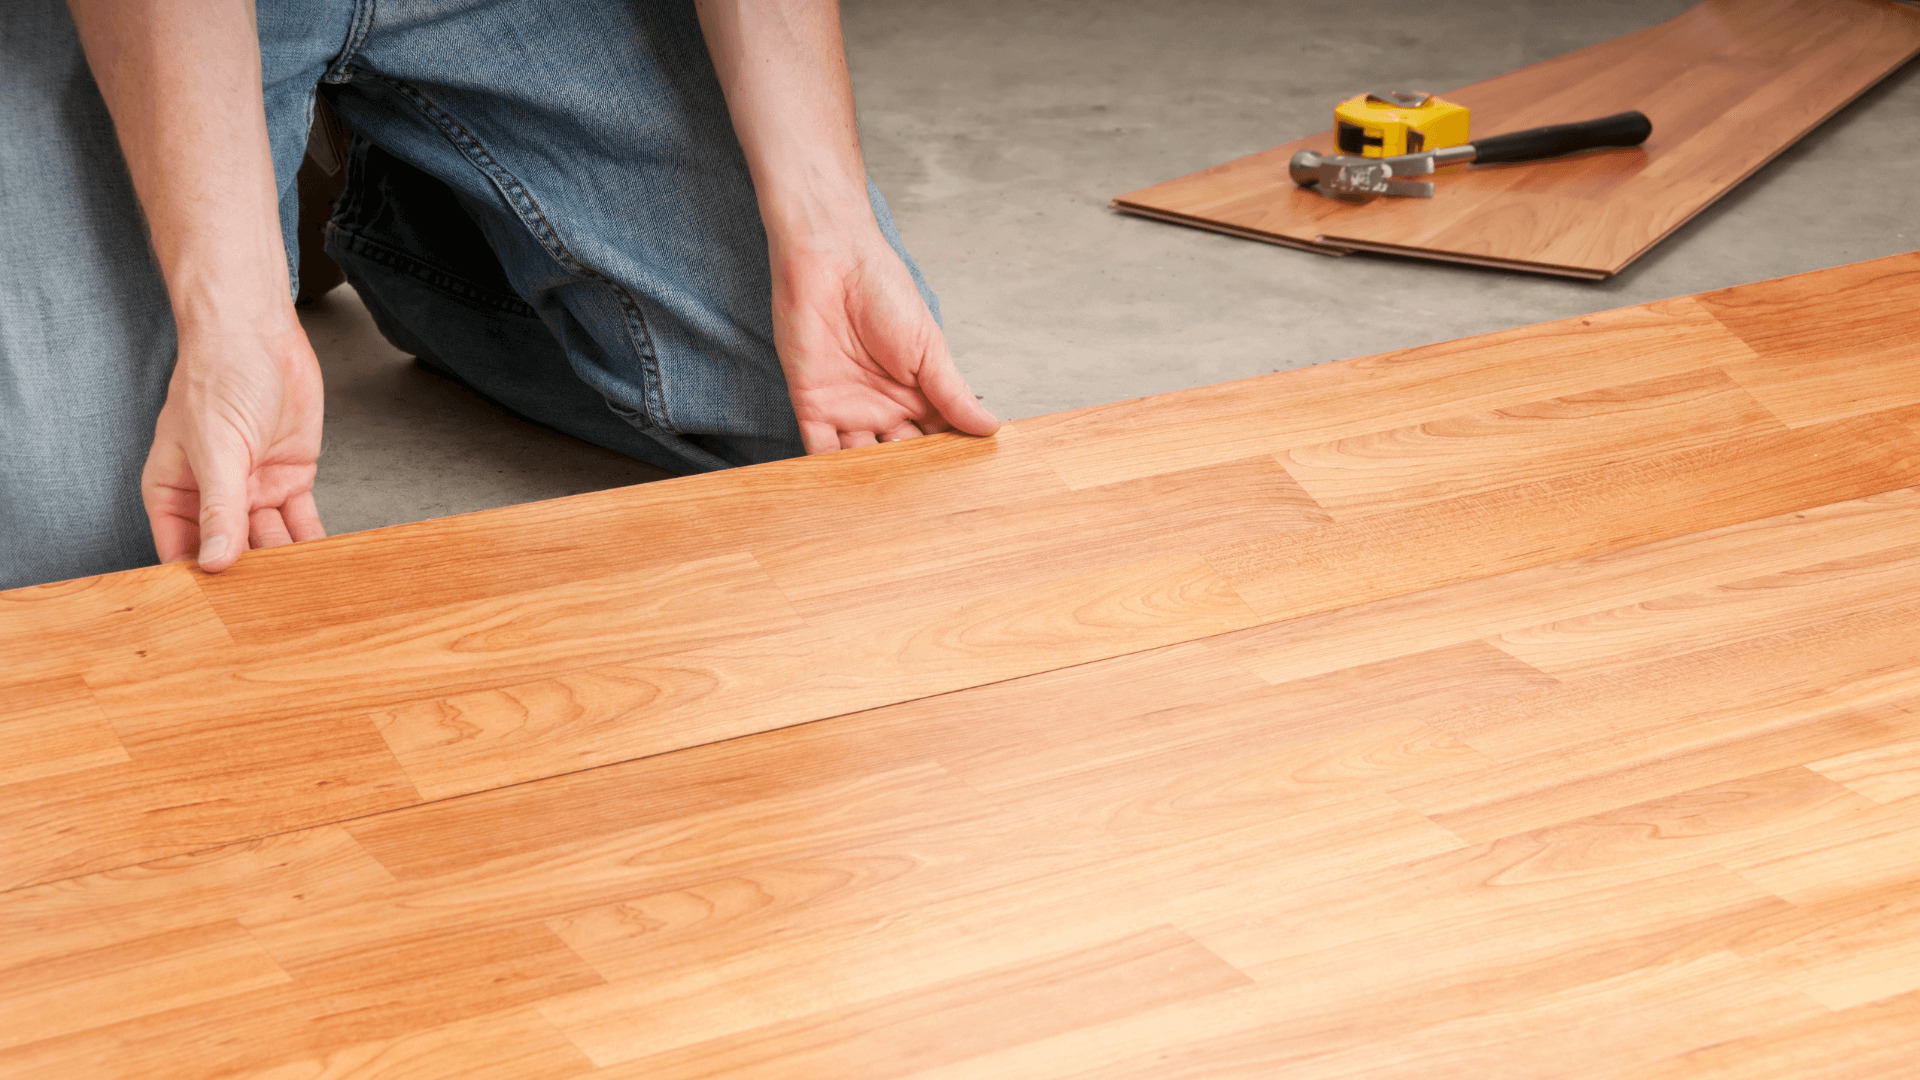
Nowadays, concrete is widely used in home improvement projects as homeowners like sanded concrete floors due to their attractiveness and practicability.

While many homeowners rely on floor sanding Geelong professionals for a perfect finish, you can do it yourself, too. You just need to prepare yourself and gather some essential supplies for a smooth concrete sanding process.

Keep reading, and we will simplify the process for your understanding.

Essential Concrete Sanding Tools

So, first things first. You will require specific equipment and supplies to ensure a hassle-free concrete floor sanding process. Based on your concrete type, floor condition, and project size, you will need different tools.

Here, we have covered some basic and essential tools to make your concrete sanding easier:

Polishing Pads and Diamond Sandpaper

When dealing with small-scale sanding tasks, choose manual methods such as polishing pads or diamond sandpaper. Avoid regular sandpaper, as it lacks the necessary hardness for cement surfaces.

Use long strokes and apply consistent pressure with your chosen polishing pads or diamond sandpaper. Start with a coarser grit and progress to finer ones for a smooth, polished surface.

Recommended for: Targeting small areas such as filled cracks or holes.

Handheld Concrete Sander

Handheld sanders are small electric tools ideally used by hand for sanding floors. With adjustable speed settings, they swiftly sand surfaces and may have integrated water supply features. Their small size eases the movement, making them greatly helpful for corners and edges.

They are widely used on small flat surfaces like bathroom floors and countertops. However, they can be challenging when used in vertical applications like walls.

Recommended for: Bathroom floors, countertops

Floor Sanding Melbourne

Belt Sander

A belt sander is an electric tool with sandpaper rotating in a loop. It’s great for sanding concrete in large areas like garage floors.

Belt sanders work best for aggressive sanding applications, but they sometimes leave marks on the surface. To avoid this, you can start with a belt sander and finish with a gentler tool like a handheld concrete sander. This combo will reduce the risk of visible marks.

Recommended for: Garage floors

Orbital Sander

Orbital sanders are handheld tools that sand using random circular motions. It helps to sand the concrete floors in any direction, unlike belt sanders, which only move back and forth.

To sand concrete with an orbital sander, prepare your area, switch it on, and move it smoothly in circles or back and forth. They’re great for small projects like bathroom floors or countertops, providing a smooth finish.

Recommended for: Bathroom floors, countertops

Floor Concrete Grinder

Floor concrete grinders are large electric machines with rotating pads for sanding surfaces. They’re great for large outdoor areas like driveways and patios. You just have to walk behind the machine and push it to sand the surface evenly.

Some models have handles that can be adjusted for sanding or polishing. These grinders are perfect for making driveways and patios smooth and polished.

Recommended for: Driveways, patios

Angle Grinder

An angle grinder is a specialised sanding tool with circular grinding blades, a side handle, and a motor designed for sanding concrete effectively.

Unlike regular sanders that use sandpaper, angle grinders have tough discs that can sand concrete faster. When using an angle grinder, it’s important to be careful to ensure the concrete is sanded evenly.

Recommended for: Basement floors, garage floors

How to Sand Concrete Floors?

As you have now gathered all the required tools for your concrete floor sanding Geelong project, you might be excited to give your floors a renewed look. So, let’s begin the concrete sanding process:

  • Prepare the Area

Before sanding concrete, start by inspecting the surface and getting it ready. Remove any bumps, clean away dust and dirt, and fill in any holes.

If you’re sanding indoors, clear the room or cover objects with plastic sheets to protect them from the dusty mess sanding creates. For large areas, divide the space into sections. Work on one section at a time to get the finish you want before moving on.

  • Choose Your Ideal Method and Tool

Once your floor surfaces are ready, you must choose the right concrete sanding method. There are three major options:

  • Polishing Machines: These machines create a smooth concrete surface.
  • Densifying Chemicals: Liquids used to bond minerals to concrete surfaces.
  • Shot Blasting: Shooting fine-grit materials such as glass beads onto concrete to enhance its texture.

Once you have chosen your convenient method, you need to select the appropriate sanding machine for your floors. Here’s a comparison that can make your selection process easier:

  • To fix small cracks, use handheld diamond sandpaper or polishing pads.
  • For indoor projects like bathroom floors or countertops, use a handheld concrete or orbital sander.
  • Go for a belt sander if you deal with large jobs like garage floors.
  • If you’re working on large outdoor areas like patios or driveways, consider using a floor concrete grinder or walk-behind grinder.


  • Repair Concrete if Needed

Once your work area and tools are ready, inspect the concrete thoroughly. If you find any cracks, chips, or small issues, use epoxy or masonry sealant to fix them. This will make the surface smoother and give it a more professional appearance after sanding.

Also, check for any nails or screws stuck in the concrete and remove them. This prevents them from causing damage to your sanding equipment.

  • Wear the Safety Gear

Now, consider your safety. Wear coveralls, a mask, goggles, and ear protection, and have a shop vac ready to clear debris when sanding.

Concrete floor sanding produces hazardous silica dust, which can lead to lung cancer. Thus, ensure you’re properly outfitted before starting any sanding tasks.

  • Begin Sanding the Concrete

Before you start sanding concrete, gather your gear and set up your work area. Use a rough sanding pad, like 30 or 60 grit, to begin. It’s safer to sand wet to avoid spreading harmful dust.

After the first sanding round, clean off any dust or debris from the concrete surface. A vacuum works for dry debris, while a towel or sponge is good for wet debris, known as slurry.

Keep sanding with finer grits, cleaning the surface in between. Finish with a high grit sandpaper, around 200 to 400 grit, for a smooth finish.

  • Clean the Floors

Once you’ve finished sanding, ensure your work area is thoroughly cleaned before sealing. Use a vacuum or dusting cloth to remove any remaining debris. Wash the area with soapy water and let it dry completely, which could require up to 48 hours.

Dispose of any leftover mix or waste responsibly by taking it to a landfill or considering recycling options. Properly managing concrete rubble is essential for environmental sustainability.

  • Try a Strong Hardener

In this stage, you can ensure your concrete is strong and long-lasting. Apply a hardener to give it extra strength and protection against scratches and wear.

Choose a good-quality hardener and carefully follow the instructions for safe usage. Make sure to read and understand all safety guidelines before starting your project.

Once the hardener is applied and dried, you’re ready to move on to the next step: applying finish or sealant.

  • Apply a Finish/Sealant

The last step is simple: use a sealant! This protects your concrete from moisture and damage caused by high foot traffic, keeping it looking just as good as when it was first poured.

When choosing a sealant, select one that is used for outdoor use because it can handle different weather conditions.

Make sure you know how to apply the sealant correctly. Doing it evenly now prevents problems later, like uneven surfaces or water damage.

With these easy steps, your concrete floors will stay looking great for a long time!

Maintenance Tips for Sanded Concrete Floors

Now you have finished the concrete sanding process, but that’s not all.

You also need to maintain your sanded concrete floors correctly to prevent scratches and other damages in future. Follow these tips to ensure the longevity of your beloved floors:

  • Avoid using rubber-backed mats or placing potted plants directly on finished concrete, as they can trap vapours and cause mineral deposits. Instead, use planters with legs for ventilation and protect furniture legs with caps to prevent scratches.
  • Protect your concrete floors by fitting furniture legs with protective caps to prevent scratches and scuffs.
  • Apply floor wax in high-traffic areas to shield the concrete. In winter, use sand or cat litter for traction, avoiding salt that can harm the sealant.
  • Keep concrete floors clean by mopping them with water regularly. For larger spaces, consider using an automatic floor scrubber.

Concrete Floor Sanding FAQs

Can You Sand Concrete?

Yes, concrete can indeed be sanded, either manually or with the assistance of an electric power tool. The choice of method depends on the desired final appearance and the size of the area being worked on. For minor repairs and detailed work, manual sanding with concrete polishing pads or diamond sandpaper is suitable. However, for larger surfaces such as countertops and floors, an orbital sander or similar power tool is more efficient.

Regardless of whether you’re sanding by hand or using a power tool, it’s advisable to work on wet surfaces rather than dry ones. This helps to minimise the dispersion of harmful cement dust and debris.


Why Sand Concrete?

Sanding concrete offers several benefits, including:

  • Rounding edges: Concrete edges can become sharp due to chipping over time. Sanding helps to smooth these edges, making the surface safer.
  • Repairing imperfections: Cracks or holes in concrete can be filled with a concrete filler and then sanded down to blend seamlessly with the surrounding area.
  • Preparing for finishes: Before applying a sealant or finish to concrete floors or countertops, it’s essential to sand the surface to ensure proper adhesion.

How to Achieve a Super Smooth Finish on Concrete?

To achieve an exceptionally smooth finish on concrete, use high-grit sandpaper, typically between 200 and 400 grit. However, it’s essential to start with a coarser grit and progressively work your way up to the finer grits for optimal results.

Final Notes

Sanding concrete floors might seem hard, but you can smooth them out easily with the right tools like diamond grinding wheels and polishing pads. Don’t forget to seal the surface afterwards to protect it from damage and spills.

Before starting any concrete project, make sure you have everything you need. Following these tips will help you confidently sand concrete floors and get great results!

DIY concrete floor sanding is a good idea, but it also poses the risk of uneven sanding and over-sanding. So, it’s better to consult floor sanding Geelong experts to make the process easier. Total Floor Service is your go-to destination when looking for reliable floor sanding services. Get in touch today with our team, and let us elevate your property value!

Floor Sanding Geelong

Complete Guide: Why Bamboo Floor Sanding And Restoration For Your Home?

Bamboo flooring has gained immense popularity in recent years due to its unique aesthetic appeal, eco-friendly nature, and durability. As a homeowner, you want your living space to reflect your personal style and provide a comfortable environment for your family. Bamboo floor sanding and polishing stand out as excellent choices when it comes to flooring options. Not only is it visually stunning, but it is also a sustainable and renewable resource. 

In this comprehensive guide, we delve into the necessity of bamboo Floor Sanding Geelong and restoration, outlining its benefits such as renewed natural beauty, increased durability, and eco-friendliness. Uncover the signs indicating your bamboo floor requires attention and follow our step-by-step process for sanding and refinishing. Equip yourself with recommended tools, learn common pitfalls to avoid, and embrace aftercare tips for a lasting, lustrous bamboo floor. Whether a DIY enthusiast or opting for professional assistance, this guide ensures your bamboo floor remains a captivating centrepiece in your home.

Understanding the need for bamboo floor sanding

Over time, even the most well-maintained bamboo floors can show signs of wear and tear. Daily foot traffic, furniture movement, and exposure to sunlight can cause scratches, dents, and fading. This is where bamboo floor sanding and restoration come into play. Sanding the surface of your bamboo floor removes imperfections, restores its natural beauty, and extends its lifespan.

Benefits of bamboo floor sanding and restoration

  1. Renewal of natural beauty: Bamboo floor sanding Geelong eliminates scratches, dents, and stains, revealing the true beauty of the wood. The process removes the old protective finish, allowing you to apply a fresh coat that enhances the natural colours and patterns of the bamboo.
  2. Increased durability: By sanding and refinishing your bamboo floor, you are effectively strengthening its structure. The removal of surface imperfections creates a smoother and more resilient surface that can withstand daily wear and tear for years to come.
  3. Improved indoor air quality: Bamboo is naturally hypoallergenic and resistant to dust mites, making it an excellent choice for those with allergies or respiratory issues. Sanding the floor removes any accumulated dust, dirt, or allergens, ensuring a cleaner and healthier living environment.
  4. Sustainability and eco-friendliness: Bamboo is a highly renewable resource, known for its fast growth and minimal environmental impact compared to traditional hardwoods. Choosing bamboo floor sanding and restoration over replacing the flooring contributes to sustainability by extending the life of the existing material and reducing the need for new resources.

5.Cost-effectiveness: Sanding and restoring bamboo floors can be a more economical option compared to replacing the entire flooring. It allows you to refresh and revitalise your space without the expense of purchasing new flooring materials, making it a budget-friendly choice for homeowners.

Signs that your bamboo floor needs sanding and restoration

  1. Visible scratches and dents: If you notice numerous scratches and dents on your bamboo floor, it is a clear indication that it needs sanding and restoration. These imperfections not only detract from the floor’s appearance but also compromise its structural integrity.
  2. Fading or discolouration: Over time, exposure to sunlight can cause bamboo flooring to fade or develop uneven discolouration. Sanding and refinishing the floor can help bring back its original colour and restore a uniform appearance.
  3. Worn-out protective finish: The protective finish on your bamboo floor serves as a shield against moisture, stains, and daily wear. If you notice that the finish has become dull, worn, or damaged, it is time to consider sanding and applying a fresh coat.
  4. Uneven surface or warping: A bamboo floor that exhibits unevenness or warping may indicate underlying issues such as water damage or changes in humidity. Sanding and restoration can help address these issues, creating a smoother and more level surface.
  5. Squeaky or creaky noises: If you hear squeaks or creaks when walking on your bamboo floor, it could be a sign of loose or damaged floorboards. Sanding and refinishing the floor can help secure loose boards and eliminate annoying noises, restoring the floor’s stability.

Keep in mind that regular maintenance and proper care can prolong the life of your bamboo floor and minimise the need for extensive restoration. If you notice any of these signs, it’s advisable to consult with flooring professionals to assess the extent of the damage and determine the best course of action for sanding and restoration.


A step-by-step guide to bamboo floor sanding and restoration

Step 1: Preparation

Before you begin sanding your bamboo floor, it is crucial to prepare the area properly. Start by removing all furniture and rugs from the room. Cover any adjacent surfaces or items that you want to protect from dust and debris. Make sure the space has adequate ventilation by opening windows or turning on fans.

Step 2: Sanding

To sand your bamboo floor, you will need to rent a drum sander or hire a professional. Begin sanding in the direction of the bamboo grain, starting with coarse-grit sandpaper and gradually progressing to finer grits. Ensure that you sand the entire surface evenly, paying extra attention to high-traffic areas and visible imperfections.

Step 3: Cleaning

Once you have finished sanding, it is essential to thoroughly clean the floor to remove all dust and debris. Use a vacuum cleaner or a broom followed by a damp mop to ensure a clean surface for refinishing.

Step 4: Refinishing

Now comes the exciting part—refinishing your bamboo floor. Choose a high-quality, eco-friendly finish that suits your style and preferences. Apply the finish by brushing or rolling it on, as directed by the manufacturer. Allow the floor to dry completely before moving furniture back into the room.

Recommended tools and equipment for bamboo floor sanding

  • Drum sander
  • Sandpaper (coarse, medium, and fine grits)
  • Vacuum cleaner or broom
  • Damp mop
  • Protective gear (safety goggles, dust mask, gloves)

Common mistakes to avoid during the bamboo floor sanding

  1. Skipping proper preparation: Failing to prepare the area adequately can result in dust and debris spreading throughout your home. Take the time to cover surfaces, remove furniture, and ensure proper ventilation before you begin sanding.
  2. Using incorrect sandpaper grit: Starting with sandpaper that is too coarse or skipping grits can damage your bamboo floor. It is crucial to follow the recommended sanding sequence, gradually progressing to finer grits for a smooth and even finish.
  3. Over-sanding: Excessive sanding can weaken the bamboo floor and reduce its lifespan. Avoid applying excessive pressure or spending too much time in one area. Keep the sanding process consistent and even.
  4. Neglecting to inspect and repair the floor: Before starting the sanding process, carefully inspect your bamboo floor for any damages or protruding nails. Addressing these issues beforehand will ensure a smoother and more effective sanding process, preventing further damage.

5.Skipping the dust removal step: After sanding, it’s essential to thoroughly clean and remove dust from the surface. Neglecting this step can result in a less polished and uneven finish when applying the finish or sealant. Use a vacuum cleaner, tack cloth, or a damp mop to eliminate all sanding dust before proceeding with the next steps.

Aftercare tips for maintaining your newly sanded bamboo floor

  1. Regular cleaning: To maintain the beauty of your newly sanded bamboo floor, it is essential to establish a regular cleaning routine. To get rid of dust and debris, regularly sweep or vacuum the floor. Use a damp mop or microfiber cloth for deeper cleaning.
  2. Protective measures: Place doormats at entryways to prevent dirt and moisture from being tracked onto the floor. Use furniture pads or felt protectors to prevent scratches caused by furniture movement.
  3. Avoid excessive moisture: Bamboo is susceptible to water damage, so it is crucial to avoid excessive moisture on the floor. Clean up spills promptly and avoid excessive mopping.
  4. Temperature control: Maintain a stable indoor environment by regulating temperature and humidity levels. Bamboo flooring can be sensitive to extreme fluctuations, so try to keep the room within a recommended range to prevent any potential warping or damage.
  5. Use appropriate cleaning products: Choose cleaning products specifically designed for bamboo flooring. Avoid harsh chemicals, ammonia-based cleaners, or abrasive tools that can damage the finish. Opt for pH-neutral and bamboo-friendly cleaning solutions to ensure the longevity of your floor.

Hiring a professional for bamboo floor sanding and restoration

While sanding and restoring your bamboo floor can be a rewarding DIY project, it is not without its challenges. If you are unsure about your skills or lack the necessary tools, it is advisable to hire a professional flooring contractor. They have the expertise and experience to ensure that your bamboo floor is sanded and restored to perfection, giving you peace of mind and saving you time and effort.

Conclusion: Enjoy the beauty and durability of your restored bamboo floor

Investing in bamboo floor sanding Geelong and restoration is a wise decision that allows you to enjoy the natural beauty and durability of your bamboo floor for years to come. By following the step-by-step guide, using the recommended tools, and avoiding common mistakes, you can transform your worn-out floor into a stunning centrepiece of your home. 

Remember to maintain your newly sanded floor with regular cleaning and protective measures. Whether you choose to take on the project yourself or hire a professional, Total Floor Service guarantees a beautiful and rejuvenated bamboo floor that adds value to your home.

Ready to transform your space? Contact Total Floor Service today for expert bamboo floor services and elevate the beauty and value of your home! 

floor sanding Melbourne

How To Sand Wood Floors: Expert Floor Sanding Tips And Tricks

Wood floors have always been a sought-after feature in homes, adding a touch of elegance and warmth to any space. However, over time, these floors can lose their lustre due to wear and tear, scratches, and the accumulation of dirt and grime. 

That’s where floor sanding Geelong comes in. Sanding is a process that involves removing the top layer of wood to reveal a smooth, fresh surface. 

In this blog post, we will guide you on how to sand wood floors, providing our expert floor sanding tips and tricks. 

Understanding the Basics of Floor Sanding

Floor sanding is a crucial step in restoring the beauty of wood floors. It involves using various sanding tools to remove the old finish, scratches, and imperfections, revealing a fresh layer of wood. Before embarking on your floor sanding journey, it’s essential to understand the basics.

Wood floors suitable for sanding typically include solid hardwood, engineered wood, and some bamboo floors. However, it’s essential to check with a floor sanding Geelong professional to ensure your specific floor can be sanded without causing damage.

Safety precautions are also paramount during floor sanding. Wear protective gear such as safety goggles, a dust mask, and ear protection. Additionally, it’s crucial to ensure proper ventilation in the room you’re working in to avoid inhaling harmful dust particles.

  1. Preparing for Floor Sanding

Proper preparation is key to a successful floor sanding project. Here’s a step-by-step guide and floor sanding tips to help you prepare your room for sanding:

  1. Remove all furniture and objects from the room to create a clear workspace. This will prevent damage to your belongings and allow easy manoeuvring during the sanding process.
  2. Cover any vents or openings with plastic or tape to prevent dust from spreading throughout your home.
  3. Inspect the floor for any damage or imperfections. If you come across loose boards, cracks, or gaps, make the necessary repairs before sanding. This will ensure a smooth and even surface.

2.Choosing the Right Tools and Equipment

It’s essential to use the right tools and equipment for the job to achieve professional results. Here are some essential tools that we use to provide professional floor sanding services:

  1. Belt sanders: These powerful machines are ideal for removing old finishes and levelling the floor. They come in various sizes, so choose one that suits the size of your project.
  2. Edgers: Edgers are designed to sand along the edges of the floor where the belt sander cannot reach. They are crucial for achieving a consistent finish throughout the entire floor.
  3. Orbital sanders: Orbital sanders are excellent for smoothing imperfections and achieving a finer finish. They are lightweight and easy to handle, making them ideal for sanding smaller areas or hard-to-reach spots.

When it comes to sandpaper, different grit sizes serve other purposes. Coarse grit sandpaper (around 40-60 grit) is used initially to remove the old finish or deep scratches. Medium-grit sandpaper (around 80-100 grit) is then used to smooth out any imperfections left by the coarse grit paper. Finally, fine grit sandpaper (around 120-150 grit) is used to achieve a polished surface for the final sanding stage.

3. Step-by-Step Guide to Proper floor sanding Geelong Technique

  1. Starting with Coarse Grit Sandpaper

Begin by attaching the coarse grit sandpaper to your belt sander. Start in a corner of the room and work across the floor, moving with the grain of the wood. Apply even pressure as you move the sander back and forth, ensuring you cover the entire surface. Be careful not to linger in one spot too long, as it may result in an uneven surface. Continue sanding until you have removed the old finish or deep scratches.


  1. Moving on to Medium Grit Sandpaper

Once you have completed the initial sanding with the coarse grit paper, it’s time to switch to medium grit sandpaper. This step is crucial for achieving a smooth and even surface. Use an edger to sand along the room’s edges, then switch to an orbital sander for the main floor area. Move the sander in a diagonal pattern to ensure evenness. Remember to maintain consistent pressure throughout the process.

  1. Finishing with Fine Grit Sandpaper

The final sanding stage involves using fine grit sandpaper to achieve a polished surface. Attach the fine grit sandpaper to your orbital sander and work across the floor, following the grain of the wood. Take care to avoid over-sanding or creating uneven areas. This stage is about achieving a smooth finish, so pay attention to detail and take your time.

4.Cleaning Up After Sanding

Sanding wood floors generates a significant amount of dust. To ensure a clean and dust-free environment, follow these hardwood floor sanding tips:

  1. After each sanding stage, use a broom or vacuum cleaner with a brush attachment to remove dust from the floor. Pay special attention to corners and edges where dust tends to accumulate.
  2. Use a damp cloth or mop to wipe down the entire floor, removing any remaining dust particles. Ensure the cloth or mop is only slightly damp to prevent excess moisture on the wood.
  3. Allow the floor to dry completely before moving to the next sanding stage or applying polish.

5.Final Steps: Polishing and Finishing Touches

After sanding, it’s time to apply polish or sealant to protect and enhance the beauty of your newly sanded floors. Follow these steps for a professional finish:

  1. Choose a polish or sealant compatible with your wood floor. Read the manufacturer’s instructions carefully and ensure proper ventilation during application.
  2. Apply the polish or sealant using a clean, lint-free cloth or applicator. Work in small sections, moving with the grain of the wood. Allow each coat to dry completely before applying additional coats.
  3. For added protection and shine, consider buffing the floor with a buffing machine or pad attached to a handheld drill. This will help to distribute the polish evenly and achieve a smooth, lustrous finish.

Conclusion

Sanding wood floors can be challenging, but you can achieve professional-looking results with the proper knowledge and tools. In this blog post, we have covered the importance of professional floor sanding Geelong, the basics of floor sanding, and the steps involved in preparing for sanding. And, Total Floor Service would be your right choice as our professionals know how to follow these above steps of floor sanding like a pro. So, grab your phone and book our professional floor sanding service from our site. 

Floor Sanding Geelong

Tips And Tricks To Fix Floor Scratches Advised By Professional Floor Sanding Experts

Having beautiful and well-maintained floors can significantly enhance the overall aesthetics of your home. However, scratches and damage to your floors are inevitable over time, especially in high-traffic areas. Whether you have hardwood, laminate, vinyl, or tile floors, it’s essential to address scratches promptly to prevent further damage and maintain the beauty of your flooring.

Regular maintenance practices such as Floor Sanding Geelong and polishing play a crucial role in preserving the longevity and appearance of your floors. Floor sanding helps remove surface imperfections, while polishing adds a protective layer, enhancing the shine and durability of the floor. These procedures not only address existing scratches but also contribute to the overall upkeep of your flooring, ensuring it remains a focal point of elegance in your home.

In this blog post, we will explore various tips and tricks recommended by professional floor sanding experts to help you fix floor scratches effectively

So, let’s dive into this helpful guide and get those floor scratches fixed!

Common causes of floor scratches:

  1. Pets’ claws: Our furry friends bring so much joy to our lives, but their claws can unintentionally cause scratches on our floors. Whether it’s a playful kitten or an energetic dog, their claws can leave behind marks.
  2. Furniture movement: Moving furniture around can scratch your floors, especially if there are no protective pads or sliders placed underneath the legs. The weight and friction between the furniture and the floor can cause unsightly scratches.
  3. High foot traffic: Areas with high foot traffic, such as entryways and hallways, are prone to scratches. Regularly walking back and forth in these areas can wear down the protective layer of your flooring, making it more susceptible to scratches.
  4. Abrasive dirt and debris: Dirt, sand, and small rocks brought in from outside can act like abrasives on your floors. When people walk on these particles, they can grind against the floor surface, leading to scratches over time. Using mats at entry points can help minimise the amount of abrasive materials that reach your floors.
  5. Improper cleaning tools: Using harsh or abrasive cleaning tools, such as hard-bristle brooms or rough scouring pads, can contribute to floor scratches. It’s essential to choose cleaning tools that are suitable for the specific type of flooring you have to avoid causing damage during routine cleaning.

 Understanding Floor Scratches: Assessing the Severity of Scratches

It is important to assess the severity of the scratches before attempting any repair methods. Here’s a breakdown of surface-level scratches vs. deep gouges:

Floor Sanding Geelong

Surface-level scratches: These scratches are superficial and only affect the top layer of the floor finish. They can often be repaired with quick fixes and DIY methods.

Deep gouges: Deep gouges penetrate through the top layer of the floor finish and may even reach the wood or tile beneath. These types of scratches require more extensive repair methods and may necessitate professional help.

To effectively repair floor scratches, it’s essential to assess their severity accurately. By evaluating the scratches, you can determine the appropriate repair method and avoid wasting time and effort on unnecessary repairs. One way to assess scratches is to examine them closely under natural light or a flashlight. This will help you identify the depth and extent of the damage.

Tip: Quick Fixes for Minor Surface-Level Scratches

For minor surface-level scratches, there are several easy DIY solutions that you can try before considering more extensive repairs. One popular method is to create a mixture of vinegar and olive oil. Combine equal parts of vinegar and olive oil, and apply the mixture to the scratch using a soft cloth. Gently rub the mixture into the scratch, following the direction of the grain. This method can help camouflage the scratch and make it less noticeable.

There are also specialised scratch repair products available in the market. These products are designed to fill in the scratch and blend with the surrounding flooring. Before using any product, make sure to read and follow the manufacturer’s instructions carefully. Additionally, always test the product on a small, inconspicuous area before applying it to the entire scratch.

Tip: Repairing Deep Scratches and Gouges

If the scratches on your floors are deeper and more severe, they may require more advanced repair techniques. One common method recommended by professional floor sanding Geelong experts is using wood filler. Wood fillers are available in various colours to match different wood flooring shades. To repair deep scratches or gouges, clean the affected area thoroughly and apply the wood filler according to the manufacturer’s instructions. After the filler dries, use sandpaper to smooth the surface. Finally, apply a protective finish or sealer to restore the shine and protect the repaired area.

In some cases, sanding the entire floor may be necessary, especially if the damage is extensive. Sanding removes the top layer of the flooring, including scratches and imperfections, allowing you to refinish the floor and achieve a uniform appearance. Sanding is a more labour-intensive process and may require specialised equipment, so it’s recommended to seek professional assistance or refer to detailed tutorials for guidance.

Tips and Tricks: Quick Fixes for Minor Scratches

A. Using DIY scratch repair kits:

There are numerous DIY scratch repair kits available in the market that can effectively reduce the visibility of minor scratches. These kits typically contain materials like wax, markers, or putty. Here are a few common and useful products to think about:

  1. Scratch Repair Pens: These pens are filled with coloured wax that can be applied directly to the scratch. The wax fills the scratch, camouflaging it and blending it with the surrounding flooring.
  2. Scratch Repair Putty: Putty can be used to fill in deeper scratches. After smoothing out the putty and applying it to the scratch, allow it to dry. Once dried, you can sand it down and apply a matching floor finish.
  3. Scratch Repair Markers: Similar to pens, scratch repair markers come in different colours to match your flooring. Apply the marker to the scratch, let it dry, and then gently buff the area to blend it with the rest of the floor.
  4. Microfiber Cloths and Polishing Compounds: Some scratch repair kits include microfiber cloths and polishing compounds. These compounds are designed to gently buff away surface scratches, making them less noticeable. The microfiber cloth helps in applying the compound evenly and polishing the area to a smooth finish.
  5. Abrasive Pads or Sandpaper: For slightly deeper scratches, kits may include abrasive pads or sandpaper with varying grit levels. These tools are used to carefully sand down the scratched area, preparing it for the application of fillers or finishing products. It’s important to follow the kit’s instructions and use the appropriate grit to avoid causing further damage.

Remember to carefully read and follow the instructions provided with the DIY scratch repair kit, as different products may have specific application techniques and drying times. Additionally, testing the product on a small, inconspicuous area first can help ensure that the colour and finish match your flooring before treating the visible scratches.

B. Homemade remedies for minor scratches:

If you prefer a more natural approach, there are a few household items that you can use to minimise the appearance of minor scratches. Here are some friendly tips based on expert recommendations:

Vinegar: Create a paste by mixing equal parts vinegar and olive oil. Apply the paste to the scratch and let it sit for a few hours. Wipe away the excess and buff the area to blend it with the rest of the floor.

Olive oil: Apply a small amount of olive oil to a soft cloth and rub it onto the scratch. This can help moisturise and minimise the visibility of the scratch.

Tea bags: Steep a tea bag in hot water, allow it to cool, and then apply it to the scratched area. The tannins in tea can sometimes help darken the scratch, making it less noticeable. Gently buff the area after the application for a smoother finish.

Baking soda: Create a thick paste by combining baking soda with water and applying it to the scratch. Let it sit for a few minutes before gently rubbing the area with a soft cloth. Baking soda’s mild abrasive properties can aid in smoothing out the scratch.

Toothpaste: Non-gel toothpaste, particularly those with baking soda or a mild abrasive, can be applied to minor scratches. Dab a small amount onto the scratch, rub it in with a soft cloth, and wipe away the excess. This method is often recommended for wooden surfaces.

These household remedies are not only cost-effective but also provide a chemical-free alternative for addressing minor scratches, leaving your surfaces looking refreshed and renewed. Always test any remedy in an inconspicuous area first to ensure compatibility with the material.

 Preventative Measures

While fixing floor scratches is essential, preventing them in the first place is even better. Here are some practical tips to help you prevent future floor scratches:

  1. Use protective pads under furniture legs to minimise friction and scratching.
  2. Avoid dragging heavy objects across the floor. Instead, lift and carry them to prevent scratches.
  3. Place doormats at all entry points to trap dirt and debris that can scratch the floor.
  4. Implement a regular maintenance routine, including sweeping, vacuuming, and mopping with a microfiber mop or a damp cloth.
  5. Consider applying a protective coating, such as wax or a polyurethane finish, to provide an extra layer of protection for your floors.

If you find yourself dealing with more significant or complex floor damage, don’t hesitate to consult professional floor sanding experts. They have the knowledge, experience, and specialised tools to handle even the most challenging repairs. Seeking their advice can save you from potential mistakes and ensure the longevity of your flooring.

Hiring Professional Floor Sanding Services

While many minor scratches can be repaired using DIY methods, certain situations may require the expertise of professional floor sanding Geelong services. If the scratches on your floors are severe, or extensive, or if you’re unsure about the appropriate repair techniques, it’s best to consult with professionals. Floor sanding experts have the knowledge, experience, and specialised equipment to handle complex repairs and deliver outstanding results. When hiring professionals, it’s essential to do thorough research and choose reputable companies or individuals who have a track record of providing quality services.

Frequently Asked Questions about Floor Scratch Repairs

To address some common concerns about floor scratch repairs, here are a few frequently asked questions:

Q: Can I use the same repair methods for different types of flooring materials?

A: While some methods, such as using wood filler, can be applied to various wood flooring types, it’s essential to consider the specific needs of your flooring material. For example, certain laminate or vinyl floors may require specialised repair products or techniques.

Q: How much do professional floor sanding services cost?

A: The cost of professional floor sanding services varies depending on factors such as the extent of damage, the size of the area, and the location. It’s best to request quotes from multiple professionals and compare their services and prices.

Q: How long does it take to repair floor scratches?

A: The time required to repair floor scratches depends on the severity of the damage and the repair method used. Minor surface-level scratches can often be fixed within a few minutes, while more extensive repairs may take several hours or even days.

Conclusion

In conclusion, fixing floor scratches, including floor sanding Geelong and polishing, can be a simple task with the right knowledge and techniques. Understanding the common causes of scratches and the susceptibility of different flooring materials is crucial in determining the appropriate repair methods. 

Whether you opt for a DIY fix or seek professional help, it is important to assess the severity of the scratches and choose the most suitable approach, which may include floor sanding and polishing for a comprehensive restoration. By taking preventive measures and practising regular maintenance, you can minimise the occurrence of future scratches and keep your floors looking beautiful for years to come with Total Floor Service.

Choose Total Floor Service for lasting floor perfection. Prevent scratches and ensure enduring beauty through our preventive measures and regular maintenance. Elevate your space with our expert care—because your floors deserve the best.

Floor Sanding Geelong

Why Choose Floor Sanding Professionals to Sand Parquet Floor?

OH! Does your parquet floor look a little worse for wear these days? The wood has dulled, the finish has faded, and the whole thing is just crying out for some TLC. It’s time for a refresh, and you’re tempted to rent sanding equipment and DIY it to save a few bucks.

Hold up – not so fast. Sanding parquet floors is an art form that requires skill, experience, and professional equipment of parquetry sander to get right. If you botch the job, you could end up with uneven floors, damaged wood, and a result that looks amateur at best. The pros have high-powered sanders and edging tools designed specifically for parquet floors. They know how to sand parquet floors at just the right speed and grit to smooth your floor without over-sanding. And they’ll apply a perfect finish that will have your parquet floor looking brand new.

So do yourself a favour – call in the experts for this one. Your parquet floor deserves the best, and so do you. Let our professionals in Floor Sanding Geelong work our magic so you can enjoy your beautiful floors. Sanding parquet is not a DIY job for the faint of heart. Leave it to the pros, and you’ll have no regrets.

Why Sand Your Parquet Flooring?

Sanding your parquet floors breathes new life into them. Over time, parquet floors can become scratched, dull, and worn. Sanding removes the top layer to expose a fresh surface, leaving your floors looking like new again.

Professional floor sanding makes the floor sanding process fast and effective. They have high-powered sanding machines that can quickly sand an entire floor. Doing it yourself would require renting equipment and take far longer to complete. Professionals also have the proper protective gear and experience to do it safely.

Floor Sanding Geelong

Sanding renews the finish and protects the wood. After sanding, professionals apply a new coat of polyurethane or lacquer finish. This restores the protective seal and gives floors a glossy sheen. The new finish helps prevent future scratches, stains, and water damage.

New finishes can change the tone. If you want to go darker or lighter, sanding allows you to re-stain the wood in your desired hue before re-finishing. Professionals have a range of stains to help you achieve your ideal colour.

Dust-free sanding is a premium service worth considering. Conventional sanding creates a lot of wood dust that settles throughout the home. Dust-free sanding uses special sanders and filters that virtually eliminate airborne dust, minimising mess and cleanup. Professionals completely seal and contain the work area during the floor sanding process.

In the end, sanding parquet floors is best left to the professionals. Their experience, equipment, and services allow the job to be done thoroughly, efficiently, and with minimal disruption. Your floors will look brand new again and last for years to come. What more could you want?

Dangers of DIY Parquet Floor Sanding

DIY sanding a parquet floor may seem easy to save money, but there are dangers to consider before tackling this project.

Health hazards

The dust from sanding parquet floors contains silica, which can irritate your eyes and respiratory system. Without proper protective equipment like masks, goggles and ventilation, the fine particles can cause long-term damage. Professionals have the necessary safety gear and industrial vacuums to handle the dust during the sanding and polishing floors process.

Potential damage

It’s easy to make mistakes sanding parquet floors that can permanently damage the wood. Using the wrong grit sandpaper, uneven sanding, or sanding too aggressively can scratch, dent or destroy the flooring. Professionals are trained to properly sand parquet floors without causing harm. They use high-quality sanding machines and sandpaper for the job.

Time and effort

DIY parquetry floor sanding requires a significant time commitment to do it right. Renting the equipment, preparing the space, sanding the floor, and cleaning up the mess can take tiring work days. Professionals have the skills, crew, and experience to complete the job efficiently without you having to lift a finger.

Warranty issues

Many parquet floor manufacturers require professional installation and sanding to maintain the warranty. DIY work can void the warranty, and any future damage or needed repairs would be at your own expense. It’s best to check with the manufacturer before sanding the floors yourself.

In summary, while the DIY approach may seem budget-friendly, professional parquet floor sanding Geelong eliminates health hazards, prevents damage, saves time, and ensures your warranty remains intact. For quality results without the hassle, hire a professional.


Benefits of Hiring Professional Parquet Floor Sanders

Hiring professional parquet floor sanders to refinish your floors has many benefits.

  • Experience and expertise

Professionals have years of experience sanding and refinishing hardwood floors. They know the proper techniques and products to get your floors to look new again. DIY sanding can easily damage the wood or leave an uneven, messy finish.

  • High-quality results

With the proper equipment and experience, professionals can sand out deep scratches, stains and imperfections in the wood and apply a smooth, durable finish. They use high-quality sanders, edgers and buffing pads to sand the floors thoroughly yet gently. The result will be a beautiful, long-lasting finish that enhances the natural wood grain.

  • Efficiency

Parquetry floor sanding is a big job and can be very time-consuming if you do it yourself. Professionals have the heavy-duty equipment to sand floors quickly and efficiently. They can sand and re-finish an average-sized room in a day. DIY sanding a parquet floor by hand would take an entire weekend and require a lot of gruelling labour.

  • Health and Safety

Parquet floor sanding generates a lot of wood dust, which can be hazardous to your health. Floor sanding professionals properly contain the dust using vacuums, dust extractors and protective gear. They also seal off and ventilate the area from the rest of the house. DIY sanding a parquet floor would expose you and your home to high amounts of airborne dust and debris, which can cause respiratory issues.

In summary, hiring parquet floor sanding Geelong professionals is worth the investment. They have the skills, equipment, and experience to efficiently and safely sand and refinish your floors with quality results. Your floors will look beautiful and last for years to come.

What to Look for in a Parquet Floor Sanding Company

When choosing a company to sand and refinish your parquet floors, look for floor sanding professionals with experience, proper equipment, and a good reputation.

Experience

Seek companies specialising in hardwood floor sanding and refinishing, especially parquet floors. Parquet can be tricky to work with due to its geometric pattern. Experienced professionals will know how to sand parquet floors properly without damaging the pattern. They can also advise you on stains and sealers to enhance the floor’s beauty. Companies that only dabble in hardwood floor work may not have the expertise to handle parquet floors.

Proper Equipment

Reputable companies will have high-quality equipment explicitly designed for sanding and refinishing parquet floors or hardwood floors, like belt sanders, edgers, and buffing pads. They should also have detail sanders to sand around the parquet pattern carefully for parquet floors. Their equipment should be well-maintained and adequately ventilated to control dust. Some even use dustless sanding systems for a cleaner process.

Good Reputation

Check online reviews from sites like HomeAdvisor, Yelp or the company’s Google Business listing. Look for “parquet floor sanding near me” with mostly positive reviews mentioning good experiences with parquet floor refinishing. See what other customers say about the quality of work, timeliness, cleanliness and overall satisfaction. You might also ask the company for references from previous parquet floor customers.

A professional hardwood floor sanding company with parquet experience, high-quality equipment and stellar reviews will do the job right. They can sand, stain and seal your floors, restoring their beauty and protecting the wood for years. And with their expertise, your parquet pattern will shine through as a work of art.

How Much Does Professional Parquet Floor Sanding Cost?

Professional parquet floor sanding and refinishing does come at a cost, but the results are well worth the investment. On average, you can expect to pay between $3 to $8 per square foot for professional parquet floor sanding and finishing, depending on factors like the condition of your current flooring, number of coats needed, and choice of finish.

Cost Factors

Several elements determine the total cost:

  • Square footage. The larger the area, the higher the price. Professionals charge by the square foot.
  • Condition of existing flooring. Floors with significant damage, stains or imperfections will require more intensive sanding and refinishing parquet floors, increasing cost.
  • Type of sanding. Basic sanding to rough up the surface is cheaper than intensive sanding to remove old finishes or stains before refinishing.
  • Number of coats. Additional coats of finish, sealant, or lacquer mean additional labour and materials, raising the total price.
  • Choice of finish. Polyurethane and lacquer tend to cost more than wax or oil. Stain or tinted finishes also add to the cost versus a clear finish.
  • Additional services. Things like repairs, replacements, installation of thresholds or transitions between flooring types, or moving and replacing furniture will increase the project price.

Cost-Saving Tips

There are a few ways to save money on professional parquet floor refinishing:

  • Get multiple estimates. Compare quotes from different contractors to find the best value.
  • Ask about discounts or package deals. Some companies offer lower rates for sanding and refinishing together or doing all home floors.
  • Consider DIY for small areas. If only a few spots need a touch-up, you may sand and re-stain or re-lacquer those areas to save paying a pro for the whole floor.
  • Do prep work yourself. Move furniture and trim away from walls before the professionals arrive. This reduces the time they need to spend on your job and may lower your bill.

While the cost of professional parquet floor refinishing may seem high, the transformation will make an invaluable difference in the beauty and function of your home. And with the proper maintenance, a professionally refinished parquet floor can last many years.

Conclusion

What you’re waiting for? Now you have all the reasons why you should hire Total Floor Service professionals for floor sanding Geelong when sanding your parquet floors. Our professionals have the proper equipment, training, and experience to do the job thoroughly while avoiding damage. We can make quick work of a time-consuming task and ensure your floors look their absolute best when done. Your parquet floors are a significant investment and deserve the best care. Do yourself and your home a favour and call in our pros for this project. You’ll be glad you did once you see the beautiful results.


floor sanding Geelong

Floor Sanding Mistakes You Need to Avoid Right Now

In the world of home improvement, there’s a strong temptation to tackle projects with a DIY approach. From fixing small issues to sprucing up your living space, doing it yourself can be rewarding. However, there are certain tasks that should be left to the experts, and floor sanding is one of them.

Floor sanding is a tricky job that requires specific skills and knowledge. If you attempt it without the right expertise, you could end up causing serious harm to your floor.

In this blog, we’ll explore the common mistakes people make when sanding their floors and how to avoid them. So, before you grab that sander, let’s take a closer look at the dos and don’ts of floor sanding Geelong to help you avoid any costly mishaps.


Common Floor Sanding Mistakes You Might Make


Using Inadequate Equipment

One of the most common mistakes in DIY floor sanding is not realizing that there are many different types of sanding machines, each with its own strengths and purposes.

Some are great for hardwood floors, while others work better on softer materials. Some are used for initial sanding, while others are used for the final, smooth finish before adding finishing touches. It’s important to choose the right machine for your specific flooring and the stage of sanding you’re at.

floor sanding Geelong


Solution:

Make sure you have:

  • A quality drum sander for the main sanding.
  • Edge sanders for reaching tight spaces and corners.
  • Various grit sandpaper for progressive sanding. 

Sanding Improperly

Deciding on an ideal extent of sanding for a wooden floor can be challenging, as it varies depending on each floor’s unique characteristics. Initially, when you start sanding, you’ll observe a significant transformation as the old finish and dirt are removed. 

However, as you proceed beyond this phase, the visible progress may appear less dramatic. It’s important to remember that the right amount of sanding depends on the floor’s condition, and it can be different for each one. 

 Solution:

  • Don’t halt sanding after just one or two passes with the machine.
  • Dedicate yourself to the task, meticulously sanding even the smallest remaining imperfections. 

Putting Too Much Pressure on The Sander

As every one of us wants to get rid of the floor sanding task ASAP, it’s common to push the sander with excessive pressure. However, this approach often leads to a myriad of issues, such as cut-through, swirls, uneven sanding, and increased heat production. 

These problems can be detrimental, potentially causing premature wear and tear to the sander and disc.

 Solution:

  • Instead of applying excessive pressure, maintain a gentle touch on the sander.
  • Allow the sander to glide smoothly across the surface, mimicking the natural movement of sliding. 

Utilising the Wrong Grit Sandpaper

One of the most common floor sanding mistakes is using the incorrect grit sandpaper for the job. For floor sanding, there are three primary grit categories to consider. Coarse sandpaper comes in the 40 to 80 grit range, which is perfect for the initial sanding to eliminate polish layers. Meanwhile, medium grit is best for smoothing out the surface after the initial coarse sanding.

Fine sand grit sandpaper, with options ranging from 180 to 230 grit, is ideal for the final touches and polishing, either before applying finishing products or in between layers of them. Using the wrong grit for floors will ruin your results. 

Solution:

  • Begin with a maximum of 24 grit paper.
  • Stick within the 16-24 grit range for optimal results. Adjust coarseness based on the condition of your floors. 

Embrace the Magic Professionals can Make


Undoubtedly, when it comes to sanding floors, taking a do-it-yourself approach without experience can lead to many problems. It’s often much better to hire floor sanding Geelong professionals who not only understand different types of flooring but also have the right tools and skills for sanding.

The most important thing is to find a reliable floor sanding company, and here are some key things to look for:

  1. Vast experience in floor sanding and flooring in general.
  2. Access to modern, high-quality sanding equipment.
  3. Fair and affordable pricing.
  4. A track record of doing excellent work and a professional attitude.
  5. Excellent customer service to make sure you’re happy with the results.


Final Thoughts 

Once you’ve got a skilled crew for sanding your floors, you can attain excellent results while avoiding expensive errors that could harm your floors. 

In fact, hiring floor sanding Geelong experts can actually save you money in the end, as you won’t need to pay for repairs or redo the job yourself.

So, if you want to get your floors sanded professionally, you can rely on Total Floor Service to ensure excellent outcomes. Our team boasts years of experience and can easily handle the most complex projects, leaving a sparkling shine on your floors. Contact us and experience the difference yourself.

Floor Sanding Geelong

Floor Sanding: Tips And Techniques To Achieve A Professional Finish

In this guide, we’ll cover some safety tips and techniques for Floor Sanding Geelong. We’ll also go over the supplies you’ll need to get the job done and show you how to prepare your home before you start sanding. By the end of this article, you won’t have any excuses for not having perfectly smooth floors!

Plan your project

The first step in any flooring project is to plan out how you will approach the job. This includes determining how much time you have available and what tools and materials are needed. It’s also important to consider safety issues, such as whether there are any risks involved with working on ladders or other high surfaces, or if anyone may be harmed by the dust created by sanding floors (if so, then take steps such as wearing a mask). 

Finally, make sure that all materials can be disposed of according to local regulations–some products contain harmful chemicals that must be disposed of carefully!

Dust-proof your home

Dust-proofing your home is a crucial step in any floor sanding project. You want to keep kids, pets and other distractions out of the room until you’re done with all the sanding work. 

Floor Sanding Geelong

Make sure doors are closed (and locked!) at all times while working on this project; if possible, cover furniture with plastic sheeting and put drop clothes over carpeting so that sanded dust doesn’t get tracked around or left behind on floors.

Once everything is covered up and secured in place, use a wet/dry vacuum to remove dust as you go along during each step of your sanding process.

Tape up any baseboards or crown molding

  • Tape up any baseboards or crown molding. Any trim that’s close to the floor will be sanded down, so it’s important to protect it with painters tape. Make sure that your tape is secure and will not come off during the sanding process!
  • Use a sharp utility knife to cut through the painter’s tape when you’re finished with this step (and before moving on).
  • Protect any surfaces you don’t want sanded

It’s important to protect areas that you don’t want to get sanded, so make sure you cover everything with plastic or something similar. This will keep dust from getting on them and make cleanup easier later on. 

You’ll want to cover furniture with plastic or sheets, windows with plastic and doors with cardboard if you have an open door in your room (or else just leave them closed). If possible, also cover floors with sheets of plywood or other materials that can easily be removed after sanding is complete.

Gather your tools and materials

  • Make sure you have all the tools and materials you need to complete your project. If you don’t, it might be time to revisit: Do a quick inventory of your garage or basement, because there’s no way around this step!
  • Don’t forget to wear protective clothing: coveralls are great for keeping dust off of clothes; gloves protect hands from splinters and scratches; goggles protect eyes from flying debris; earplugs help keep out noise (if needed).

We hope you found this article helpful, and we wish you good luck with your Floor Sanding Geelong project. Make sure you select the right company. Total Floor Service is your one-stop shop for all your flooring needs and we have the right experts who can handle all kinds of flooring problems with the use of the latest technology.

Floor Sanding Geelong

Floor Sanding in Kitchens – How to Prepare floor sanding service

A floor sanding service is an excellent way to bring back the original look of your kitchen. 

Whether you want a complete makeover or just want to touch up areas that have become damaged over time, Floor Sanding Geelong service is a quick and easy process for achieving results that will last for years. Here are some tips on preparing your home for this type of project:

Plan ahead

Planning ahead is the key to any successful project. This rings especially true when it comes to floor sanding services in Kitchens, because it can be hard to plan for something you’ve never done before. 

You may not know what you need or how much it will cost, but if you’re smart about it, planning now will save both time and money later on.

Planning out what tools or materials are needed will help prevent mistakes or unnecessary purchases during the actual sanding process itself. 

Remove all furniture and appliances

It’s important to remove all furniture and appliances from the kitchen. If you have a dishwasher, remove it and place it in a safe place. If you have a fridge, remove it and place it in a safe place as well.

Protect the baseboards and joints of your walls

Protect the baseboards and joints of your walls.

Use masking tape to protect the baseboards, and painter’s tape to protect the floor.

Use a drop cloth over the entire floor area so that you do not damage it during sanding.

Do some pre-cleaning before every step

Before every Floor Sanding Geelong service step, you should do some pre-cleaning. Use a vacuum cleaner to remove dust and debris from the floor, then clean it with a damp, clean cloth or mop. 

Floor Sanding Geelong

The next step is to use mild detergent and water mixture on your mop to clean the floor. Then dry it off with another dry cloth or mop

Have a look around the kitchen

The first thing you need to do is have a look around the kitchen. Look for any electrical sockets, pipes or cables that may be hidden behind cupboards and units. 

If there are any, make sure they’re covered with plastic or tape before sanding commences so they don’t get damaged in any way by the sandpaper.

Next, clean up all of your tools and equipment so that they’re ready for work when it comes time for them to be used again after finishing off one section of flooring at a time (this will help ensure accuracy). 

You’ll also want to protect yourself during this process by wearing goggles or safety glasses when using power tools such as electric sander machines; these will protect against debris flying into your eyes should anything go wrong during operation which could otherwise cause serious injury!

Conclusion

It’s important to have a plan for your kitchen floor sanding. You don’t want to be caught off guard by any unexpected obstacles that may come up during the process, so make sure you do some research before starting this project. 

Total Floor Service is a Floor Sanding Geelong specialist. We take great care when sanding and coating around kitchen cabinets. We usually sand to within 5 mm of the kick-boards. The job is then finished with specific hand-held scrapers. 

Floor Sanding Geelong

Bring Your Auditorium Floor Back to Life with Floor Sanding

An auditorium is the perfect venue for many events. From musical performances to conferences and lectures, it can provide an ideal space for a variety of occasions. If you’re looking for a way to restore the lustre of your auditorium floor, Floor Sanding Geelong is a great option. Regular maintenance can help protect and preserve the wood, and sanding is an essential part of that process. Read on to learn more about the benefits of floor sanding and why it should be part of your regular maintenance routine.

Appearance Matters 

The appearance of your auditorium can make or break your event. If it’s dull and drab, you’ll likely have trouble drawing in a crowd. One of the biggest advantages of Floor Sanding Geelong is that it helps remove any surface damage caused by wear and tear over time. Scratches, scratches, and other minor imperfections can all be removed by sanding, leaving behind a smooth, even surface. It also helps protect the wood from further damage by sealing it off from moisture, dirt, debris, and other environmental factors.  

Durability & Longevity 

Floor sanding is also an excellent way to increase the longevity of your floor. Sanding helps to remove any scratches or blemishes that may have accumulated over time, while also protecting against future damage from foot traffic or furniture movement. A well-maintained floor will last longer than one that hasn’t been properly cared for, meaning you’ll get more bang for your buck in terms of long-term value.  

Floor Sanding Geelong


Improved Aesthetics 

Floor sanding can help to restore the beauty of a hardwood floor in an auditorium. Over time, dirt, grime, and scuffs can accumulate on a hardwood floor, making it look dull and worn out. With regular maintenance, such as sanding and refinishing, your hardwood floors will look shiny and new again. Additionally, you may want to consider adding a new finish or stain to your floors in order to give them a unique look that reflects your vision for your auditorium space.                 

Easy Maintenance & Cleanup 

Sanding also makes it easier to maintain and clean up after events held in your auditorium due to its smoother surface compared with one that has not been sanded. This makes it easier for janitorial staff or volunteers to sweep up any dirt or debris quickly before it has a chance to accumulate on the floor and become harder to clean up later on. And since all types of dust particles are removed during sanding, there will be fewer allergens present in the air which is beneficial for both audience members and performers alike! 

Conclusion: 

Overall, investing in professional Floor Sanding Geelong services can help improve both the appearance and longevity of an auditorium’s floors while making them easier to maintain and clean afterwards as well. 

Whether you’re hosting small events such as lectures or large concerts, calling Total floor service will help ensure your guests have a pleasant experience each time they visit your venue!


Floor Sanding Geelong

How Floor Sanding Can Increase The Value Of Your Home

If your floors have seen better days, you may be considering Floor Sanding Geelong. Floor sanding is a great way to update your home and increase its value. It can also improve the look and feel of your home. If you’re interested in learning more about what floor sanding entails, keep reading!

A smooth surface is a clean surface.

A smooth surface is a clean surface. That’s why a lot of people choose to have Floor Sanding Geelong. When you have your floors sanded and finished, not only does it make them look more stylish, but it will also be easier for you to clean them as well. A rough finish, on the other hand, means that dirt and grime get stuck in the crevices, which makes your floor harder to keep clean over time and can lead to stains on your beautiful polished flooring if not properly cared for.

Allergies are a thing of the past.

Wood floors can be a source of dust and allergens. This is especially true if the wood is not properly finished when installed, which may result in gaps between boards that can trap dust. Removing all this dust with floor sanding will improve air quality in your home and reduce the risk of allergies and asthma.

It pays to keep our wood floor in good condition.

When it comes to wood flooring, there are two basic types: hardwood and softwood. Hardwood floors are generally made from maple, cherry, walnut and oak trees. They can be sanded and refinished multiple times for many years with proper care. 

The great thing about both types of wood floors is that they age beautifully over time—so even if you don’t love how they look when you first install them (and who does?!), they’ll likely improve with age!

The good news is that you don’t need an army of people or equipment to make this happen: just one person with some elbow grease can get your floor looking good as new in just one day!

All those pretty colours!

You can have a unique floor that is as individual as you are. Most people choose from a wide range of colours and finishes for their floors, but it’s just as important to consider the type of flooring that best suits your needs. For example, an engineered wood product may be the best option for you if you have young children or pets. This type of flooring has been designed to last longer than laminate or solid timber and is more resistant to scratches and scuffs caused by heavy furniture being dragged across them, which means they require less maintenance over time.

Conclusion

So, there you have it—if you’re looking for ways to increase the value of your home, then we think floor sanding is a great option. Floor sanding can greatly affect how your home looks and feels. If you’re interested in learning more about what we do here at Total Floor Service, be sure to check out our website!