Tips And Tricks To Fix Floor Scratches Advised By Professional Floor Sanding Experts
Having beautiful and well-maintained floors can significantly enhance the overall aesthetics of your home. However, scratches and damage to your floors are inevitable over time, especially in high-traffic areas. Whether you have hardwood, laminate, vinyl, or tile floors, it’s essential to address scratches promptly to prevent further damage and maintain the beauty of your flooring.
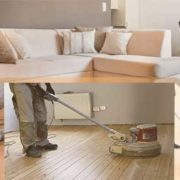
Regular maintenance practices such as Floor Sanding Geelong and polishing play a crucial role in preserving the longevity and appearance of your floors. Floor sanding helps remove surface imperfections, while polishing adds a protective layer, enhancing the shine and durability of the floor. These procedures not only address existing scratches but also contribute to the overall upkeep of your flooring, ensuring it remains a focal point of elegance in your home.
In this blog post, we will explore various tips and tricks recommended by professional floor sanding experts to help you fix floor scratches effectively
So, let’s dive into this helpful guide and get those floor scratches fixed!
Common causes of floor scratches:
- Pets’ claws: Our furry friends bring so much joy to our lives, but their claws can unintentionally cause scratches on our floors. Whether it’s a playful kitten or an energetic dog, their claws can leave behind marks.
- Furniture movement: Moving furniture around can scratch your floors, especially if there are no protective pads or sliders placed underneath the legs. The weight and friction between the furniture and the floor can cause unsightly scratches.
- High foot traffic: Areas with high foot traffic, such as entryways and hallways, are prone to scratches. Regularly walking back and forth in these areas can wear down the protective layer of your flooring, making it more susceptible to scratches.
- Abrasive dirt and debris: Dirt, sand, and small rocks brought in from outside can act like abrasives on your floors. When people walk on these particles, they can grind against the floor surface, leading to scratches over time. Using mats at entry points can help minimise the amount of abrasive materials that reach your floors.
- Improper cleaning tools: Using harsh or abrasive cleaning tools, such as hard-bristle brooms or rough scouring pads, can contribute to floor scratches. It’s essential to choose cleaning tools that are suitable for the specific type of flooring you have to avoid causing damage during routine cleaning.
Understanding Floor Scratches: Assessing the Severity of Scratches
It is important to assess the severity of the scratches before attempting any repair methods. Here’s a breakdown of surface-level scratches vs. deep gouges:
Surface-level scratches: These scratches are superficial and only affect the top layer of the floor finish. They can often be repaired with quick fixes and DIY methods.
Deep gouges: Deep gouges penetrate through the top layer of the floor finish and may even reach the wood or tile beneath. These types of scratches require more extensive repair methods and may necessitate professional help.
To effectively repair floor scratches, it’s essential to assess their severity accurately. By evaluating the scratches, you can determine the appropriate repair method and avoid wasting time and effort on unnecessary repairs. One way to assess scratches is to examine them closely under natural light or a flashlight. This will help you identify the depth and extent of the damage.
Tip: Quick Fixes for Minor Surface-Level Scratches
For minor surface-level scratches, there are several easy DIY solutions that you can try before considering more extensive repairs. One popular method is to create a mixture of vinegar and olive oil. Combine equal parts of vinegar and olive oil, and apply the mixture to the scratch using a soft cloth. Gently rub the mixture into the scratch, following the direction of the grain. This method can help camouflage the scratch and make it less noticeable.
There are also specialised scratch repair products available in the market. These products are designed to fill in the scratch and blend with the surrounding flooring. Before using any product, make sure to read and follow the manufacturer’s instructions carefully. Additionally, always test the product on a small, inconspicuous area before applying it to the entire scratch.
Tip: Repairing Deep Scratches and Gouges
If the scratches on your floors are deeper and more severe, they may require more advanced repair techniques. One common method recommended by professional floor sanding Geelong experts is using wood filler. Wood fillers are available in various colours to match different wood flooring shades. To repair deep scratches or gouges, clean the affected area thoroughly and apply the wood filler according to the manufacturer’s instructions. After the filler dries, use sandpaper to smooth the surface. Finally, apply a protective finish or sealer to restore the shine and protect the repaired area.
In some cases, sanding the entire floor may be necessary, especially if the damage is extensive. Sanding removes the top layer of the flooring, including scratches and imperfections, allowing you to refinish the floor and achieve a uniform appearance. Sanding is a more labour-intensive process and may require specialised equipment, so it’s recommended to seek professional assistance or refer to detailed tutorials for guidance.
Tips and Tricks: Quick Fixes for Minor Scratches
A. Using DIY scratch repair kits:
There are numerous DIY scratch repair kits available in the market that can effectively reduce the visibility of minor scratches. These kits typically contain materials like wax, markers, or putty. Here are a few common and useful products to think about:
- Scratch Repair Pens: These pens are filled with coloured wax that can be applied directly to the scratch. The wax fills the scratch, camouflaging it and blending it with the surrounding flooring.
- Scratch Repair Putty: Putty can be used to fill in deeper scratches. After smoothing out the putty and applying it to the scratch, allow it to dry. Once dried, you can sand it down and apply a matching floor finish.
- Scratch Repair Markers: Similar to pens, scratch repair markers come in different colours to match your flooring. Apply the marker to the scratch, let it dry, and then gently buff the area to blend it with the rest of the floor.
- Microfiber Cloths and Polishing Compounds: Some scratch repair kits include microfiber cloths and polishing compounds. These compounds are designed to gently buff away surface scratches, making them less noticeable. The microfiber cloth helps in applying the compound evenly and polishing the area to a smooth finish.
- Abrasive Pads or Sandpaper: For slightly deeper scratches, kits may include abrasive pads or sandpaper with varying grit levels. These tools are used to carefully sand down the scratched area, preparing it for the application of fillers or finishing products. It’s important to follow the kit’s instructions and use the appropriate grit to avoid causing further damage.
Remember to carefully read and follow the instructions provided with the DIY scratch repair kit, as different products may have specific application techniques and drying times. Additionally, testing the product on a small, inconspicuous area first can help ensure that the colour and finish match your flooring before treating the visible scratches.
B. Homemade remedies for minor scratches:
If you prefer a more natural approach, there are a few household items that you can use to minimise the appearance of minor scratches. Here are some friendly tips based on expert recommendations:
Vinegar: Create a paste by mixing equal parts vinegar and olive oil. Apply the paste to the scratch and let it sit for a few hours. Wipe away the excess and buff the area to blend it with the rest of the floor.
Olive oil: Apply a small amount of olive oil to a soft cloth and rub it onto the scratch. This can help moisturise and minimise the visibility of the scratch.
Tea bags: Steep a tea bag in hot water, allow it to cool, and then apply it to the scratched area. The tannins in tea can sometimes help darken the scratch, making it less noticeable. Gently buff the area after the application for a smoother finish.
Baking soda: Create a thick paste by combining baking soda with water and applying it to the scratch. Let it sit for a few minutes before gently rubbing the area with a soft cloth. Baking soda’s mild abrasive properties can aid in smoothing out the scratch.
Toothpaste: Non-gel toothpaste, particularly those with baking soda or a mild abrasive, can be applied to minor scratches. Dab a small amount onto the scratch, rub it in with a soft cloth, and wipe away the excess. This method is often recommended for wooden surfaces.
These household remedies are not only cost-effective but also provide a chemical-free alternative for addressing minor scratches, leaving your surfaces looking refreshed and renewed. Always test any remedy in an inconspicuous area first to ensure compatibility with the material.
Preventative Measures
While fixing floor scratches is essential, preventing them in the first place is even better. Here are some practical tips to help you prevent future floor scratches:
- Use protective pads under furniture legs to minimise friction and scratching.
- Avoid dragging heavy objects across the floor. Instead, lift and carry them to prevent scratches.
- Place doormats at all entry points to trap dirt and debris that can scratch the floor.
- Implement a regular maintenance routine, including sweeping, vacuuming, and mopping with a microfiber mop or a damp cloth.
- Consider applying a protective coating, such as wax or a polyurethane finish, to provide an extra layer of protection for your floors.
If you find yourself dealing with more significant or complex floor damage, don’t hesitate to consult professional floor sanding experts. They have the knowledge, experience, and specialised tools to handle even the most challenging repairs. Seeking their advice can save you from potential mistakes and ensure the longevity of your flooring.
Hiring Professional Floor Sanding Services
While many minor scratches can be repaired using DIY methods, certain situations may require the expertise of professional floor sanding Geelong services. If the scratches on your floors are severe, or extensive, or if you’re unsure about the appropriate repair techniques, it’s best to consult with professionals. Floor sanding experts have the knowledge, experience, and specialised equipment to handle complex repairs and deliver outstanding results. When hiring professionals, it’s essential to do thorough research and choose reputable companies or individuals who have a track record of providing quality services.
Frequently Asked Questions about Floor Scratch Repairs
To address some common concerns about floor scratch repairs, here are a few frequently asked questions:
Q: Can I use the same repair methods for different types of flooring materials?
A: While some methods, such as using wood filler, can be applied to various wood flooring types, it’s essential to consider the specific needs of your flooring material. For example, certain laminate or vinyl floors may require specialised repair products or techniques.
Q: How much do professional floor sanding services cost?
A: The cost of professional floor sanding services varies depending on factors such as the extent of damage, the size of the area, and the location. It’s best to request quotes from multiple professionals and compare their services and prices.
Q: How long does it take to repair floor scratches?
A: The time required to repair floor scratches depends on the severity of the damage and the repair method used. Minor surface-level scratches can often be fixed within a few minutes, while more extensive repairs may take several hours or even days.
Conclusion
In conclusion, fixing floor scratches, including floor sanding Geelong and polishing, can be a simple task with the right knowledge and techniques. Understanding the common causes of scratches and the susceptibility of different flooring materials is crucial in determining the appropriate repair methods.
Whether you opt for a DIY fix or seek professional help, it is important to assess the severity of the scratches and choose the most suitable approach, which may include floor sanding and polishing for a comprehensive restoration. By taking preventive measures and practising regular maintenance, you can minimise the occurrence of future scratches and keep your floors looking beautiful for years to come with Total Floor Service.
Choose Total Floor Service for lasting floor perfection. Prevent scratches and ensure enduring beauty through our preventive measures and regular maintenance. Elevate your space with our expert care—because your floors deserve the best.



 Address:
  Phone:
  ABN: 63 602 512 489


