Floor Polishing

How To Choose A Reliable Floor Polishing Service Provider?

When it comes to maintaining the beauty of your floors, hiring a reliable floor polishing service provider is essential. A well-polished floor enhances the aesthetic appeal of your home and extends the life of your flooring material. 

With numerous options available, selecting the right service can be overwhelming. Here’s a guide to help you choose the best floor polishing Geelong service that meets your needs.

1. Research and Gather Recommendations

Start by doing some research. Ask friends, family, or neighbours for recommendations. Personal referrals can provide valuable insights into the quality of service and customer satisfaction. You can also check online reviews and ratings on platforms like Google, Yelp, or local directories. 

Look for companies that consistently receive high ratings and positive feedback, as these are often indicative of reliability and professionalism.

2. Check Qualifications and Experience

Once you have a list of potential providers, it’s crucial to check their qualifications. Ensure they have the necessary licenses and certifications to operate in your area. An experienced provider will have a proven track record in the industry. 

Don’t hesitate to ask how long they have offered floor polishing Geelong services. A company with several years of experience will likely have the skills and expertise to handle different flooring types and challenges.

3. Ask About Their Services

Not all floor polishing services are created equal. Inquire about the specific services offered by each provider. Do they provide a comprehensive floor assessment before polishing? What techniques and equipment do they use? 


Floor Polishing

The best providers will use advanced tools and eco-friendly products to ensure a safe and effective polishing process. Understanding their approach will help you determine if they are the right fit for your needs.

4. Request Quotes and Compare Prices

Cost is an important factor when selecting a floor polishing service. Request quotes from multiple providers to compare prices. However, be cautious of prices that seem too good to be true. A very low quote may indicate subpar service or the use of inferior materials. 

Look for a balance between cost and quality. Investing a little more in a reputable service will pay off in the long run, especially when it comes to floor polishing in Geelong.

5. Inquire About Insurance and Guarantees

Always check if the floor polishing service provider carries liability insurance. This protects you from any potential damages or accidents during the polishing process. 

Additionally, inquire if they offer any guarantees or warranties for their work. A reliable provider will stand by their services and offer a satisfaction guarantee, giving you peace of mind.

6. Evaluate Customer Service

Customer service is a crucial aspect of any service industry. Contact the providers you’re considering and assess their responsiveness and professionalism. 

A reliable floor polishing service provider will be eager to answer your questions and address your concerns. 

Pay attention to how they communicate—clear, friendly communication is a sign that they value their customers.

7. Look for Additional Services

The floor polishing process is sometimes just one part of a larger home maintenance plan. Check if the provider offers additional services like floor cleaning, sealing, or restoration. 

Choosing a provider that can handle multiple services can save you time and effort in the long run. Plus, it ensures you work with a team familiar with your flooring.

8. Read the Fine Print

Before making a final decision, carefully read the contract or service agreement. Ensure you understand the terms, including any additional fees, cancellation policies, and the scope of work. 

If anything is unclear, don’t hesitate to ask for clarification. A reputable floor polishing Geelong provider will be transparent and willing to explain their terms.

Conclusion

Choosing a reliable floor polishing service provider is essential for maintaining the beauty and longevity of your floors. Conduct thorough research, check qualifications, and evaluate customer service to find a service that meets your needs. 

Remember, investing in quality floor polishing Geelong services will enhance the look of your home and provide a safe and polished surface for years to come. Total Floor Service is the best one-stop ­shop for all your flooring-related needs! 

With years of experience in the industry, our technicians are highly qualified and can efficiently handle floor polishing services for any type of floor surface.

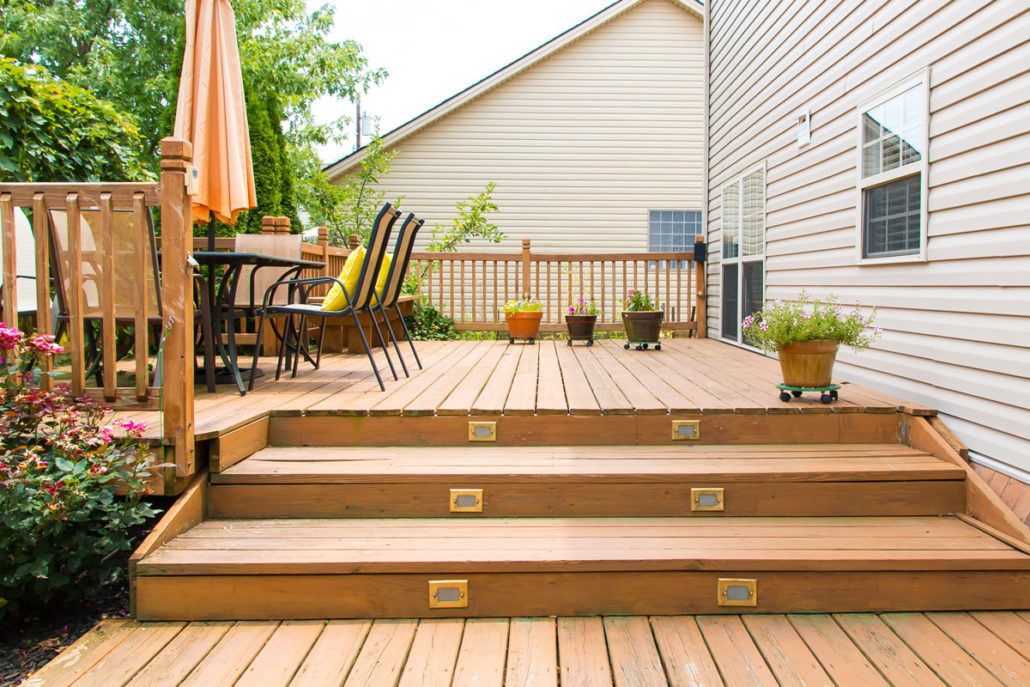
Decking Restoration Melbourne

Expert Guide To Decking Restoration: Revamp Your Outdoor Space

Are you staring at your deck and wondering if it’s time for a makeover? We’ve all been there—long summer evenings spent wishing our outdoor spaces looked as good as they felt. If your deck has seen better days, don’t fret! Decking restoration is your ticket to revitalising your outdoor haven. 

Think of it as a spa day for your deck, where the result is a space you’ll want to flaunt to everyone who visits. Ready to breathe new life into your deck? Let’s dive into this expert guide on decking restoration and discover how Decking Restoration in Melbourne can turn your tired deck into a dazzling retreat.

Why Decking Restoration Matters

When it comes to outdoor living spaces, your deck often takes the spotlight. It’s where you host summer BBQs, enjoy morning coffees, and unwind after a long day. But as time passes, weather elements, foot traffic, and general wear and tear can leave your deck looking less than stellar. 

That’s where decking restoration comes in. It’s not just about aesthetics; it’s about preserving your deck’s structural integrity and extending lifespan. A well-restored deck not only enhances your home’s curb appeal but also boosts its overall value.

The Decking Restoration Process

1. Assess the Damage

Before you start any restoration project, it’s essential to evaluate the current state of your deck. Look for signs of damage, such as splintered wood, faded finishes, and loose boards. 

This step will help you determine the extent of the restoration needed and whether you can tackle it yourself or need professional help. If your deck shows significant wear, contacting a decking restoration Melbourne expert might be the best choice.

2. Clean Thoroughly

A clean deck is the foundation of any successful restoration. Start by sweeping away debris and using a deck cleaner to remove dirt, algae, and mildew. For stubborn stains or grime, consider a power washer. 

Just be cautious with the pressure setting to avoid damaging the wood. This step not only prepares your deck for treatment but also allows you to see any hidden issues that may need addressing.
Floor Polishing


3. Repair and Replace

Once your deck is clean, inspect it for any necessary repairs. Replace any broken or missing boards, and sand down rough patches to ensure a smooth surface. Fix loose screws and nails to prevent future issues. 

This is a crucial step, as a stable and secure deck is essential for a successful restoration. If the damage is extensive, consulting with a decking restoration Melbourne professional can provide you with expert advice on the best course of action.

4. Choose the Right Finish

Selecting the right finish for your deck is like choosing the perfect outfit. It’s all about style and protection. Deck stains and sealers come in various finishes, from transparent to opaque. Consider factors such as the type of wood, the climate, and the look you want to achieve. 

A high-quality finish not only enhances the appearance of your deck but also protects against the elements. If you’re unsure which finish to choose, a decking restoration Melbourne expert can guide you through the options and help you make an informed decision.

5. Apply the Finish

With your deck prepped and your finish chosen, it’s time to apply. Follow the manufacturer’s instructions for the best results. 

Apply the finish evenly, using a brush or roller, and allow it to dry thoroughly before using your deck. The application process might take some time, but patience pays off with a beautiful and long-lasting finish.

Why Choose Professional Decking Restoration?

While DIY decking restoration is an option, professional services offer numerous benefits. A decking restoration Melbourne specialist brings experience and expertise to the table, ensuring that every aspect of the restoration is handled precisely. 

They have access to high-quality materials and advanced techniques that might not be available to the average homeowner. Plus, professional restoration can save you time and effort, allowing you to enjoy your revitalised deck sooner.

Conclusion

Decking restoration is more than just a home improvement project—it’s an investment in your outdoor living space. 

Remember, a well-maintained deck enhances your home’s beauty and provides a welcoming space for you and your loved ones to create lasting memories. 

So, why wait? Embrace the art of decking restoration in Melbourne and give your deck the makeover it deserves! 

By following these expert tips and considering professional help when needed, you can transform your deck into a stunning and functional area for relaxation and entertainment. At Total Floor Service, we take immense pride in setting ourselves apart in deck restoration. 

Our commitment to excellence is not just a promise; it’s a core value that defines every aspect of our service. With years of experience perfecting the art of deck restoration in Melbourne, we’ve honed our skills and techniques to unparalleled expertise.

floor polishing Geelong

How To Choose The Right Floor Polishing Company?

Choosing the right floor polishing company can make all the difference in keeping your floors looking their best. If you’re in Geelong and looking for top-notch service, there are many options. 

But how do you know which company will deliver the best results for your home or business? Here’s a friendly guide to help you make the right choice.

1. Assess Your Needs

Before browsing for floor polishing services, assess your specific needs. Are you looking to restore an old wooden floor, or do you need a fresh shine for a recently installed surface? 

Understanding your requirements will help you narrow down your choices. For those in Geelong, it’s essential to find a company that specialises in the type of floor you have. Floor polishing Geelong services vary, so choose one that matches your needs.

2. Check Experience and Reputation

Experience matters when it comes to floor polishing. An established company with a solid reputation is more likely to deliver high-quality results. 

Look for reviews and testimonials from previous clients. Positive feedback and a portfolio of successful projects can give you confidence in their expertise. 

Companies with extensive experience in floor polishing in Geelong will have refined their techniques and processes to ensure top-notch service.

3. Verify Credentials and Insurance

A reputable floor polishing company should have the necessary licenses and insurance. This not only ensures that they operate legally but also protects you in case of any accidental damage. 

Ask for proof of insurance and check their credentials to ensure you’re hiring a professional team. The best and top-ranked floor polishing Geelong companies with proper certification will likely offer reliable and safe services.

4. Request Quotes and Compare

Getting quotes from different companies allows you to compare prices and services. However, the cheapest option isn’t always the best. 

Look at what’s included in the quote. Does it cover the entire project, including any necessary repairs or preparations? 

Be wary of quotes that seem too good to be true. For floor polishing in Geelong, it’s worth investing in a company that offers a detailed and transparent quote.

Floor polishing Geelong

5. Ask About Techniques and Products

Different companies may use various techniques and products for floor polishing. It is important to choose a company that uses high-quality products and advanced techniques suited to your floor type. 

Ask about their methods and the products they use to ensure they’re eco-friendly and effective. The right floor polishing Geelong company will be able to explain their process and the benefits of their chosen products.

6. Look for Customer Service

Excellent customer service is a key indicator of a reliable company. The company should be responsive and professional from the initial consultation to completing the job. 

Good communication ensures that your concerns are addressed promptly and that the project runs smoothly. 

A friendly, approachable team will make the entire process more enjoyable. Choosing a company with stellar customer service can make all the difference for those seeking floor polishing in Geelong.

7. Review the Contract Carefully

Before committing to a floor polishing company, review the contract carefully. Ensure that all aspects of the job, including cost, timeline, and scope of work, are clearly outlined. 

A well-detailed contract helps prevent misunderstandings and ensures you know exactly what to expect. 

A thorough contract will protect you and the service provider when hiring a floor-polishing Geelong service.

8. Trust Your Instincts

Finally, trust your instincts. If something doesn’t feel right or you have doubts about a company, moving on to another option is okay. 

Your comfort and confidence in your chosen company are crucial for a successful floor polishing project. 

Going with a company that makes you feel at ease will ensure a positive experience when it comes to floor polishing in Geelong.

Choosing the right floor polishing company can seem daunting, but with some research and careful consideration, you’ll find the perfect match for your needs. We at Total Floor Service are committed to offering fast, efficient and excellent floor polishing services that will help you retain the back look of your floorboards. 

Our team of floor polishers is well-trained in the latest trends in the flooring industry, and we guarantee your satisfaction with our finished product.


Floor Polishing

Step-by-Step: Achieving Mirror-Like Floors Through Polishing

Nothing quite compares to the breathtaking allure of a perfectly polished floor, gleaming like a mirror under the soft glow of ambient light. 

Whether it’s a residential space or a commercial establishment, a flawlessly polished floor not only enhances the aesthetic appeal but also reflects sophistication and cleanliness. 

While achieving such a stunning finish may seem daunting, with the right tools, techniques, and a bit of patience, anyone can transform their floors into glossy masterpieces. 

In this guide, we’ll take you through the step-by-step process of achieving mirror-like floors through Floor Polishing Geelong.

  1. Preparing the Surface

Before diving into the polishing process, properly preparing the floor surface is crucial. Start by clearing the area of any furniture, rugs, or obstacles. Next, thoroughly sweep or vacuum the floor to remove dust, dirt, and debris. 

For stubborn stains or grime, consider using a mild detergent solution and a scrub brush to clean the surface. 

Rinse the floor with clean water and allow it to dry completely before proceeding to the next step. Proper surface preparation sets the foundation for a flawless polish, ensuring the final result is smooth and even.

  1. Choosing the Right Equipment and Products

Selecting the appropriate equipment and polishing products is essential for achieving professional-quality results. 

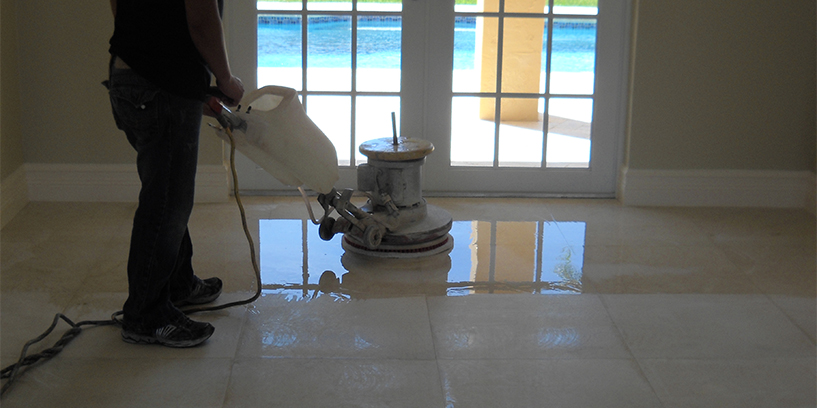
For small to medium-sized areas, a handheld or orbital floor polisher equipped with polishing pads is ideal. 

Larger spaces may require a walk-behind floor polisher or a buffing machine for efficient coverage. 

Additionally, choose floor polishing Geelong pads with varying grit levels, starting from coarse to fine, to gradually refine the surface and achieve a mirror-like finish. 

floor polishing Geelong

Invest in high-quality polishing compounds or diamond abrasives specifically designed for the type of flooring material you’re working with, whether it’s concrete, marble, granite, or terrazzo. 

Using the right tools and products ensures optimal performance and prevents damage to the floor surface.

  1. Executing the Polishing Process

With the surface prepared and the equipment ready, it’s time to begin the polishing process. 

Start by attaching the coarsest polishing pad to the polisher and applying a small amount of polishing compound or abrasive to the floor. 

Work in small sections, moving the polisher in overlapping circular motions to evenly distribute the abrasive and remove surface imperfections.

 Gradually increase the grit level of the polishing pad as you progress, repeating the polishing process until the desired level of smoothness and shine is achieved. 

Take care not to apply too much pressure or linger in one spot for too long, as this can cause uneven polishing and swirl marks. 

Once the entire floor has been polished to your satisfaction, switch to a fine polishing pad to enhance the shine and clarity of the finish.

  1. Finishing Touches and Maintenance

After completing the floor polishing Geelong process, it’s essential to perform any necessary finishing touches to ensure a flawless result. 

Inspect the floor surface for any remaining imperfections or dull areas and address them accordingly with additional polishing if needed. 

Once satisfied with the finish, thoroughly clean the floor to remove any polishing residue or dust particles. 

A damp mop or microfiber cloth is ideal, followed by a final buffing with a clean, dry cloth to enhance the shine. Establish a regular cleaning and maintenance routine to maintain the mirror-like finish of your polished floor. 

Sweep or vacuum the floor regularly to remove surface debris, and mop with a mild detergent solution as needed to keep it looking its best. Avoid harsh cleaning chemicals or abrasive materials that could damage the polished surface.

Conclusion

Achieving mirror-like floors through polishing is a rewarding endeavour that can elevate any space’s aesthetic appeal and ambience. 

By following the step-by-step process outlined in this guide and investing in the right equipment and products, anyone can transform their floors into glossy masterpieces. 

From proper surface preparation to meticulous execution and ongoing maintenance, each step is crucial to achieving professional-quality results. 

So why settle for dull and lacklustre floors when you can enjoy the timeless elegance of a perfectly polished surface? 

With patience, perseverance, and a little elbow grease, you, too, can revel in the beauty of mirror-like floors that reflect sophistication and style. With Total Floor Service, your floors are in the best hands – because we believe that every floor deserves to shine.

Floor polishing

What Is the Difference Between Buffing and Polishing a Floor

If you’ve ever wondered about the best ways to keep your floors shiny and in top-notch condition, you might have come across the terms “buffing” and “polishing.” 

Both processes aim to make your floors look shiny and new, but they do it in different ways and for various types of flooring. 

Today, we’re going to dive into what makes buffing different from floor polishing Geelong service. Understanding these differences can help you decide which method might be best for your floor, ensuring it looks its best and lasts longer. 

So, let’s get right into it and clear up any confusion you might have about these two popular floor care techniques! 

Understanding Buffing

What is Buffing floors? 

Buffing is a floor care technique that uses a fast-spinning machine with a pad or brush attached to clean and shine floors. It’s gentle and chemical-free, focusing on buffing out small scratches, dirt, and marks from the floor’s surface.

Why Buff floors? 

The main goal of buffing is to bring back the floor’s natural shine and smoothness. This process is best for durable flooring types like hardwood, vinyl, or laminate, making them look cleaner and more attractive.

How Does Buffing Work? 

In buffing, the machine’s pad spins quickly, touching the floor and heating up the finish slightly. This warmth helps spread the finish evenly, filling in any tiny scratches and making the floor look even and shiny.

Tools Needed for Buffing 

To buff a floor properly, you’ll need a high-speed buffing machine, the right pads or brushes (depending on your floor type), and a way to clean up dirt, like a dust mop or vacuum. It’s crucial to pick the correct pad to avoid damaging your floor.

Floor Polishing

Exploring Polishing

What is Polishing?

Polishing is a more intense process that involves using chemicals or abrasives to strip away a thin layer from the floor’s surface. This exposes a new, smooth layer. Unlike buffing, polishing can significantly change how a floor looks by removing some of the material.

Purpose of Polishing 

Polishing aims to refine the floor’s appearance, making it smooth and very shiny. It’s typically used on floors made from natural stone like marble, granite, or terrazzo, as well as on concrete floors.

Different Types of Polish and Techniques Used

The perfect floor polishing Geelong encompasses a variety of products and methods tailored to different types of flooring:

– Wax Polish: Commonly used on hardwood, wax polish adds a shine and protective layer that wards off water and stains.

– Diamond Polish: Ideal for hard stone floors, diamond polish achieves a high-gloss finish by using fine abrasive materials.

Each floor type requires specific techniques:

– Marble Floors: Multiple passes with progressively finer abrasives smooth the floor and enhance shine.

– Concrete Floors: Grinding and applying finishing compounds result in a glossy surface that might also be stain-resistant.

Key Differences Between Buffing and Polishing

While both processes aim at enhancing the floor’s appearance, several distinctions set them apart:

– Abrasion Level: Buffing is a milder form of abrasion compared to polishing, which may involve removing part of the floor’s material to achieve a new surface layer.

– Time Consumption: Buffing can be done relatively quickly, while polishing is more labour-intensive, often requiring multiple steps or applications.

– Outcome: Buffing primarily restores and enhances the existing shine and appearance of a floor. In contrast, polishing can fundamentally change the floor’s aesthetic by creating a new top layer that is incredibly smooth and reflective.

– Suitability: Buffing is suitable for floors that can tolerate mild abrasion without damage (like vinyl or sealed wood), whereas polishing is reserved for hardier materials such as marble or concrete, which are capable of being ground down and refinished.

Choosing the correct process depends on the floor type, the condition of the floor, the desired finish, and how much maintenance the owner is prepared to engage in. 

When to Choose Buffing or Polishing?

Before you choose between buffing and polishing your floor, it’s important to consider a few critical factors:

– Condition of the Floor: Examine how worn or damaged the floor is. Buffing is often enough for minor imperfections.

– Desired Outcome: Consider whether you want to simply enhance the existing floor or drastically change its appearance.

– Flooring Material: Different materials require specific care. Hardwood and vinyl often benefit from buffing, while natural stone or concrete might need polishing.

– Time and Effort: Reflect on how much time you’re willing to dedicate to floor maintenance. Buffing is quicker compared to the more involved polishing process.

Benefits and Drawbacks of Each Technique

Buffing:

– Benefits: Quick and less costly, enhances floor shine without altering the floor’s structure.

– Drawbacks: Not suitable for correcting deep scratches or significant wear.

Polishing:

– Benefits: Can transform the look of the floor, achieving a high-gloss finish; ideal for floors needing more thorough restoration.

– Drawbacks: More time-consuming and generally requires professional equipment and expertise.

Expert Recommendations Based on Common Scenarios

– For Routine Maintenance: Buffing is recommended to quickly refresh the floor and maintain its lustre, especially for floors like hardwood, vinyl, or laminate.

– For Restoration and High Shine: Polishing is preferable for natural stone or concrete floors when a glossy, showroom-quality finish is desired. It’s best done by professionals or with specialised equipment.

Step-by-Step Guide for Buffing Your Floor

Step 1: Gather Your Supplies 

Before you start, make sure you have all the necessary equipment:

  • High-speed buffer machine
  • Buffing pads (choose the right coarseness for your floor type)
  • Dust mop or vacuum cleaner
  • Optional: Floor cleaner (for extra cleaning)

Step 2: Clear the Area 

Remove all furniture, rugs, and other items from the area you plan to buff. This gives you a clear space to work and ensures you won’t miss any spots.

Step 3: Clean the Floor 

Use a dust mop or vacuum to clean the floor thoroughly. Removing dust, dirt, and debris is crucial before buffing; otherwise, you could end up scratching the floor with loose particles.

Step 4: Choose the Right Pad 

Select the appropriate buffing pad for your floor type. Using the wrong pad can damage the floor, so if you’re unsure, consult the manufacturer’s recommendations or ask a professional.

Step 5: Attach the Pad to the Buffer 

Securely attach the buffing pad to the buffer machine. Make sure it’s centred and firmly in place to avoid any uneven buffing.

Step 6: Start Buffing 

Turn on the buffer and gently guide it across the floor. Move in smooth, even patterns, overlapping your paths slightly to ensure full coverage. Don’t press down too hard—let the machine do the work.

Step 7: Check Your Progress 

Periodically turn off the buffer and check the floor. Look for any missed spots or areas that might need more attention. The floor should start to look shinier and more even as you continue.

Step 8: Edge Work 

Use a handheld buffer or a smaller tool to reach edges and corners where the large buffer can’t easily go. This ensures a consistent finish across the entire floor.

Step 9: Final Clean 

Once you’ve finished buffing, go over the floor with a dust mop or clean cloth to pick up any residue left behind from the buffing process. This step will also help bring out the shine.

Additional Tips:

  • Always test the buffer and pad on a small, inconspicuous area of your floor first to make sure it doesn’t damage the finish.
  • Buffing can be done periodically to maintain the floor’s shine but isn’t meant to replace deep cleaning or refinishing.
  • Consider wearing ear protection, as buffers can be loud, and ensure the room is well-ventilated during the process.

Operating the Buffer Machine and Maintaining the Finish

Ensure you understand how to operate the buffer machine safely:

– Basic Operating Steps: Attach the appropriate pad, switch on the machine, and carefully move it over the floor in overlapping rows. Apply even, gentle pressure without overly pressing down to avoid damaging the floor.

– Aftercare: Once buffing is complete, sweep or vacuum again to collect any remaining dust. To maintain the floor’s shine, regular cleaning with appropriate products is recommended. A finish-specific cleaner and a soft cloth or mop should be used to avoid scratching the new surface.

With these steps, you can effectively use a buffing machine to extend the life of your floors.

Step-by-Step Guide for Polishing Your Floor


Step 1: Choose the Right Polish

  • Hardwood Floors: Use a wax-based polish.
  • Stone Floors (like marble and granite): Opt for a diamond polish for high shine.
  • Concrete Floors: A concrete-specific polish will yield the best results.

Step 2: Prepare Your Floor

  • Clean Thoroughly: Sweep or vacuum all debris, dust, and dirt. Follow up with mopping using a gentle cleaner appropriate for your floor type. Let the floor dry completely.
  • Repair Damages: Fill in any cracks or chips in the floor. For wood, use wood filler. For stone or concrete, use a repair compound that matches your floor.

Step 3: Sanding (if necessary)

  • Wood Floors: Sand any rough patches if the floor is severely scratched or uneven. Use fine-grit sandpaper and sand lightly.
  • Stone/Concrete Floors: Skip this step if your floor is already even and smooth.

Step 4: Apply the Base Coat (if required)

  • Some Floors: May require a base coat or sealer before the actual polish. This helps the polish adhere better and last longer. Check the polish manufacturer’s instructions to see if this is necessary.

Step 5: Apply the Polish

  • Using a Polisher: Attach the correct polishing pad to your polishing machine. Pour a small amount of polish onto the floor or directly onto the pad.
  • Manual Application: If you don’t have a machine, use a soft cloth or sponge. Spread the polish in small, circular motions.
  • Even Application: Work in small sections to ensure even coverage. Overlap your passes slightly to avoid missing spots.

Step 6: Buff the Floor

  • Let Dry: Allow the polish to dry according to the product instructions—usually a couple of hours.
  • Buffing: Use a buffer to go over the area. This will smooth out the polish and bring out the shine. If you don’t have a buffer, a dry, soft cloth will work for smaller areas.

Step 7: Final Touches

  • Inspect: Check for any uneven spots or missed areas. Apply additional polish if necessary and rebuff.
  • Maintenance: Keep the floor clean and touch up the polish as needed to maintain the shine.

Ready to Decide?

In wrapping up, the distinction between buffing and polishing floors is critical for the ongoing care and maintenance of various flooring types. 

Understanding your floor’s specific needs and the results you wish to achieve can help you choose the most appropriate maintenance method. 

Whether you opt for buffing to revitalise your floor with minimal disruption or floor polishing Geelong to transform its appearance dramatically, knowing the correct procedure plays a crucial role in maintaining the aesthetics and extending the lifespan of your flooring.

Always consider talking to floor care experts like Total Floor Sanding and Polishing. We can offer personalised advice based on the type of floor you have and its current condition. 

With the right care and professional guidance, your floors will keep your space looking welcoming and impressive for many years.

Floor Polishing

Quick Guide: How Long Do Polished Floors Really Take To Dry

Are you eagerly awaiting the completion of your newly installed polished floors? If so, you’re probably wondering how long they will take to dry before you can fully enjoy them. 

In this article, we will explore the factors on How long polished floors take to dry and provide you with a clear understanding of what to expect.

Why is Drying Time Important for Polished Floors?

Understanding the drying time of floor polishing Geelong is essential for several reasons. First and foremost, knowing how long it takes for your floors to dry allows you to plan your activities accordingly. 

As a homeowner, you may want to avoid walking on the floors or moving furniture until they are scorched to prevent damage or marks. Similarly, if you’re a business owner, you must coordinate with your team to ensure that foot traffic is minimised during the drying process.

Additionally, the drying time of polished floors is crucial for maintenance purposes. If the floors are not given enough time to dry, the polish may not properly adhere, leading to a subpar finish and potentially requiring rework. 

By understanding the factors that influence drying time and taking the necessary precautions, you can ensure optimal results for your newly polished floors.

floor polishing Geelong

Factors That Affect Drying Time

Several factors can influence the drying time of polished floors. The type of polish used is one of the most significant factors. Different types of polish require different drying times. For example, water-based polishes generally dry faster than oil-based ones. 

It’s important to know which type of polish was applied to your floors, as this will give you a better idea of the expected drying time.

Another factor that can affect drying time is the humidity levels in the room. High humidity levels can significantly slow the drying process, while low humidity levels speed it up. If you live in an area with high humidity, you may need to be patient as your floors dry. However, if you have access to air conditioning or dehumidifiers, using them can help expedite the drying process.

Ventilation is another critical factor that can impact drying time. A well-ventilated room allows air to circulate, which helps moisture evaporate more quickly. On the other hand, a poorly ventilated room can prolong the drying time. Opening windows and using fans can promote airflow and aid in drying.

Average Drying Time for Different Types of Polished Floors

The drying time of floor polishing Geelong can vary depending on the type of polish used. Here are some average drying times for different types of polished floors:

  1. Water-based polish: On average, water-based polish takes 2 to 4 hours to dry. However, it’s important to note that this is just an estimate, and drying times can vary depending on the specific brand and environmental conditions.
  2. Oil-based polish: Oil-based polish typically takes longer to dry than water-based polish. On average,oil-based polish can dry completely for 8 to 24 hours. Again, this is an estimate, and drying times may vary.
  3. Epoxy polish: Epoxy polish is known for its durability and high gloss finish. However, it can take longer to dry than other types of polish. Epoxy polish can take 24 to 48 hours to dry completely.

It’s essential to remember that these are general guidelines, and the drying time for your specific floors may differ. Factors such as humidity levels, ventilation, and the number of coats applied can all impact the drying time.

Tips for Speeding Up the Drying Process

If you’re eager to speed up the drying process of your polished floors, there are a few tips you can follow:

  1. Increase ventilation: As mentioned earlier, good ventilation can help moisture evaporate more quickly—open windows and doors to allow fresh air to circulate or use fans to promote airflow.
  2. Use dehumidifiers or air conditioning. If you live in a humid climate, using dehumidifiers or air conditioning can help reduce the moisture in the air and expedite the drying process.
  3. Avoid walking on the floors. To prevent any potential damage or marks, it’s best to avoid walking on the floors until they are scorched. Use protective covers or walk-in designated areas to minimise foot traffic if necessary.

Best Practices for Maintaining Polished Floors During the Drying Period

While waiting for your polished floors to dry, following some best practices to ensure their longevity and appearance is essential. Here are a few tips to keep in mind during the drying period:

  1. Avoid placing furniture or heavy objects on the floor. These can leave marks or indentations. It’s best to wait until the floors are fully dry before moving furniture back into the room.
  2. Use protective covers: If you need to walk on the floors during the drying process, use protective covers such as shoe covers or clean towels to prevent dirt or debris from being transferred onto the polished surface.
  3. Clean up spills promptly. Accidental spills can happen, but it’s essential to clean them up promptly to prevent any moisture from seeping into the floors and affecting the drying process. Use a clean cloth or paper towel to blot the spill and remove excess liquid.

FAQs About Polished Floor Drying Time

How long does it take for polished floors to dry completely?

The drying time for polished floors can vary depending on several factors, including the type of polish used, humidity levels, and ventilation in the room. On average, polished floors can take a few hours to a couple of days to dry completely.

Can I walk on polished floors during the drying process?

To prevent damage or marks, it’s best to avoid walking on polished floors during the drying process. If necessary, use protective covers or walk-in-designated areas to minimise foot traffic.

How can I speed up the drying process of polished floors?

To speed up the drying process of polished floors, you can increase ventilation by opening windows and doors or using fans. Additionally, using dehumidifiers or air conditioning can help reduce humidity levels and expedite drying.

Conclusion

The drying time of polished floors is influenced by factors such as the type of polish used, humidity levels, and ventilation in the room. 

Understanding the expected drying time of floor polishing in Geelong is crucial so you can plan your activities accordingly and take the necessary precautions to protect your floors. Following best practices and avoiding common mistakes can ensure optimal results for your newly polished floors. 

If you’re unsure or dealing with complex circumstances, seeking professional services is always vital. Total Floor Service is a renowned provider of professional floor care solutions, trusted by homeowners and businesses alike. Our team of experts thoroughly assesses the floor’s condition and tailors their approach accordingly, ensuring that the restoration process is both effective and efficient.

Tile Cleaning Melbourne

Polished Concrete Floor Crack Repair: Why It Matters And How To Do It Right?

You’ve got that gorgeous polished concrete floor in your home or business, but uh oh – a nasty crack has appeared, marring its sleek beauty. Don’t panic! Cracks happen, but with the right repair approach, you can make it look flawless again. In this blog, we will guide you with the aid of floor polishing in Geelong experts on the topic of why those cracks form, how to properly prepare for repair, what products work best, and step-by-step instructions to seamlessly patch cracks for a polished concrete floor that looks pristine. 

With a little time and effort, you can restore your concrete to its original unbroken elegance. Let’s get that floor fixed up, right!

Why Proper Crack Repair Is Essential for Polished Concrete Floors?

If you’ve invested in polished concrete floors, protecting them should be a top priority. Cracks in the concrete threaten the beauty and durability of your polished floors. Left unaddressed, cracks can worsen over time and become more difficult to repair. Proper crack repair helps preserve the appearance of your floor and prevents further damage. Here are reasons why proper crack repair is essential.

Prevents Water Damage

Unrepaired cracks in concrete provide an easy pathway for water to seep into the floor. Water exposure leads to a multitude of issues like staining, pitting, and deterioration of the concrete. Filling cracks helps create a watertight seal and protects against water damage. The repair material you choose should be specifically designed for use in concrete and capable of withstanding exposure to moisture.

Limits Staining

As cracks widen over time, they become more prone to staining from spills, leaks, and other contaminants. Stains that penetrate into cracks can be difficult to remove and often require intensive cleaning or resurfacing of the concrete to eliminate. Repairing cracks helps prevent unsightly stains before they start and maintains the appearance of your polished floor.

Stabilises the Floor

Widening cracks in concrete floors can compromise the stability and integrity of the floor over time. As cracks spread further apart, the concrete slabs begin to move independently, creating an uneven surface. Filling cracks helps fuse the concrete slabs back together, stabilising the floor. The repair material should be strong yet flexible enough to withstand the natural expansion and contraction of the concrete.

Protecting your investment in polished concrete floors starts with diligent crack repair. Repairing cracks in a timely manner helps prevent damage, protects the appearance of your floor, and stabilises the surface—allowing you to enjoy your polished floors for years to come. With the proper technique and high-quality materials, you can effectively repair cracks and keep your concrete floors looking their best.

Identifying Different Types of Cracks in Concrete

Here are the different types of concrete cracks explained:

Hairline Cracks

The most common cracks you’ll find in concrete floors are hairline cracks. These are very narrow cracks, less than 1/8 inch wide. They’re typically caused by minor shrinkage in the concrete as it cures. Hairline cracks are usually not a structural concern, but they can still allow water and chemicals to seep into the concrete. For polished floors they need to be filled to maintain the smooth surface.

Wide or Deep Cracks

Wider cracks, 1/8 inch or more, or cracks that extend deep into the concrete can be a sign of structural issues and may require professional repair. These are often caused by excessive loading or uneven settling of the concrete foundation. If left unaddressed, wide or deep cracks can continue to spread and worsen over time. It’s best to have these evaluated by a concrete repair professional to determine the underlying cause and appropriate solution.

Corner Cracks

Cracks that start at corners, angles or joints in the concrete are also common and can be caused by normal expansion and contraction of the slab during temperature changes. However, extensive corner cracking can sometimes indicate structural damage or instability in the subgrade beneath the concrete. It’s a good idea to monitor corner cracks to ensure they do not widen or propagate significantly over time.

When to Call a Professional Floor Polishing Expert for Crack Repair?

Sometimes, concrete floor cracks are simply cosmetic, but other times, they can indicate structural issues that require professional repair. As a homeowner, it’s important to understand that DIY crack filling won’t cut it, and you need to call in the experts. Here are some cases where you need to call a professional floor polishing expert to repair cracks:

Major cracks

If you have cracks wider than 1/4 inch, it’s best to call a professional concrete contractor. These wider cracks often penetrate deep into the concrete and require special materials and techniques to properly fill and seal. DIY crack fillers typically can’t span gaps this wide and won’t provide a long-lasting solution. Professionals can inject epoxy or polyurethane into the crack or apply concrete patches for a durable repair.
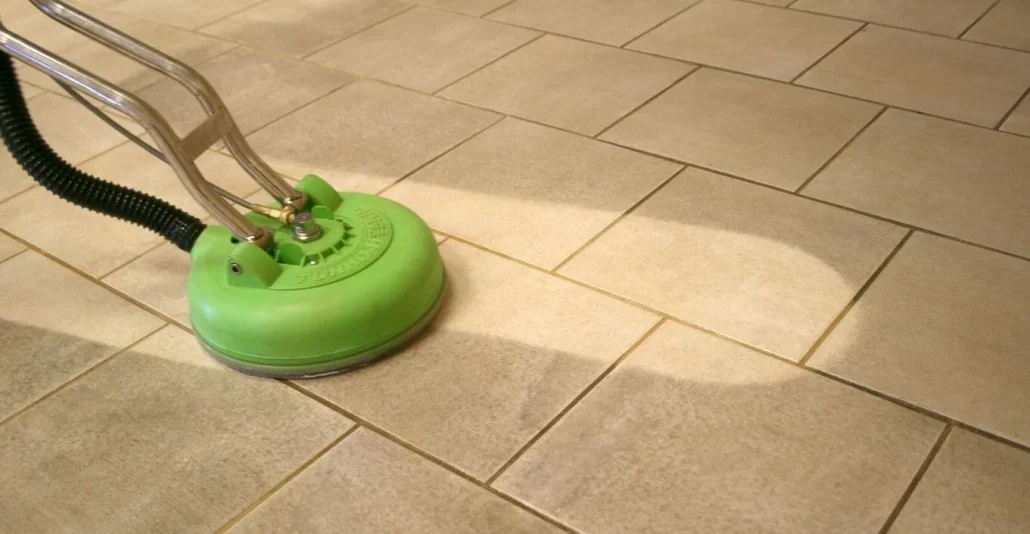
Floor Polishing Geelong

Cracks that keep reappearing

If you’ve filled cracks in your concrete floor, but they continue to widen, or new cracks form nearby, that signals an underlying problem that needs to be addressed. Continually filling the same cracks is not a permanent solution, and the issue will likely worsen over time. A professional can evaluate why the concrete is cracking and perform necessary repairs like installing concrete anchors, slabs, or beams to stabilise the floor.

Cracks in high-traffic areas

Cracks in driveways, garages, and other areas where vehicles travel, or heavy equipment is used require professional repair to stand up to the pressure. DIY crack fillers and sealants won’t last long under heavy loads and traffic. Professionals have access to commercial-grade materials specifically designed for repairing and resurfacing concrete in industrial settings and high-traffic environments.

Structural cracks

Some cracks in concrete floors can indicate structural damage or deterioration. Cracks that run diagonally across the floor cracks that cause the floor to slope or become uneven, and cracks accompanied by crumbling or spalling concrete are signs you likely have a structural issue. It’s best to have a professional evaluate the floor as soon as possible to assess the severity of the damage and perform necessary repairs to prevent further damage to the foundation. DIY repairs in these situations may do more harm than good.

When your concrete floor cracks start hinting at bigger problems, it’s time to call the experts. Professional floor polishing Geelong contractors have the knowledge, experience, and tools to thoroughly evaluate damage, perform lasting repairs, and ensure the safety of your floor. For major cracks, continual cracks, cracks in high-traffic areas, or signs of structural damage, professional help is the way to go.

DIY Repair Options for Minor Cracks

When your polished concrete floor develops small cracks, you have a few options for fixing them yourself. The key is to address them promptly to avoid further damage.DIY options to repair minor cracks are:

Epoxy Injection

For narrow cracks (1/8 inch or less), an epoxy injection kit can work well. You inject an epoxy resin into the crack, which then hardens to bond and seal the concrete. After cleaning and widening the crack slightly, you place injection ports along its length, spaced a few inches apart. Attach injection tubes to the ports, then use a caulk gun to pump epoxy through the tubes until it emerges from the next port. Once cured, the epoxy permanently repairs the crack.

Concrete Patching Compound

For slightly wider cracks (up to 1⁄2 inch), a concrete patching compound can be effective. After cleaning and roughing up the crack, apply the compound with a putty knife or trowel. Press it firmly into the crack, then smooth it so it’s slightly higher than the floor surface. Let it dry completely, then sand it down level with the floor. These compounds contain cement and epoxy resins to create a durable patch. They may need to be reapplied periodically as the floor expands and contracts.

Gravity-Fed Crack Filler

For hairline cracks where injection isn’t possible, a liquefied crack filler can work using gravity alone. Clean and widen the crack, then pour the filler over the top. It will seep into the crack, filling it from top to bottom. Once cured, the filler helps prevent further damage while blending in with the concrete. These fillers typically contain epoxy or polyurethane, along with fine aggregates that match your floor’s colour.

With regular maintenance and prompt attention, minor damage to your polished concrete floor can often be repaired successfully on your own. However, for cracks wider than 1⁄2 inch or signs of structural damage, it’s best to call in a professional. They have the proper equipment, training, and materials to evaluate the situation and make necessary repairs to prevent unsafe conditions or further deterioration.

Step-by-Step Guide to Fixing Cracks in Polished Concrete Floors

When cracks start forming in your polished concrete floors, it’s important to take action quickly to prevent further damage. Here’s how you can tackle cracks in your concrete and get your floor looking smooth again.

Clean and widen the cracks

First, use a wire brush or chisel to widen and clean out any debris from the cracks. Wider cracks, at least 1⁄4 inch across, are easier to patch and seal. Vacuum away the dust to ensure the crack is clean.

Apply concrete patch compound.

For small to medium cracks, apply a concrete patch compound, which is available at your local hardware store. Mix the compound according to the directions and trowel it into the cracks, smoothing it out so it’s level with the surrounding concrete. Let it dry completely, usually 3 to 5 hours.

Seal and protect

Once the patch compound has dried, apply 2-3 coats of concrete sealant or epoxy over the top. This protects the patch, waterproofs it, and strengthens your concrete floor. Let each coat dry in between applications. For larger cracks or damage, you may need to apply a concrete patch tape or mesh first before sealing.

Grind and re-polish (if needed)

If the crack repair has left your floor with an uneven surface, you’ll need to regrind and re-polish the area to restore the smooth finish. Rent a concrete grinder to grind away the excess patch compound and any high spots. Then, re-polish the area using progressively finer grits of polishing pads on the grinder.

Buff the area with a diamond polishing pad to bring back the shine. With some elbow grease, you can patch cracks in polished concrete floors and have them looking as good as new. Stay on top of regular maintenance and sealing to help prevent future cracking.

Conclusion

So there you have it – now you know why it’s so important to repair cracks in your polished concrete floors and how to tackle the job the right way. With a bit of patience and the proper materials, you can make those unsightly cracks disappear and restore the beautiful, smooth finish you want. Just take it slowly, thoroughly clean out each crack, use high-quality repair products, and allow time for curing. 

Follow the steps, and you’ll have floors that look brand new again. If you feel that the situation with your concrete is difficult, do not hesitate to reach out to a floor polishing expert. As they are experienced and knowledgeable regarding cracks, fix your floor with ease, and assure you of their services, it will look brand new again.

So why wait? Transform your space with our expert floor polishing Geelong and repair services. From restoring the shine to fixing cracks and damages, Total Floor Service has you covered. Get in touch now for a flawless floor makeover! Revitalise Your Floors Today!

Concrete Polishing Melbourne

How to Clean and Maintain Hardwood Floors: Tips from Floor Polishing Expert

An attractive and classic feature of every house is hardwood floors. They’re popular among homeowners because of their inherent beauty and durability. However, proper cleaning and maintenance are essential to keep your hardwood floors looking their best. 

This article will share valuable tips and insights from a floor polishing Geelong expert on how to clean and maintain hardwood floors effectively.

Why Proper Cleaning and Maintenance is Important?

Proper cleaning and maintenance of hardwood floors are essential for several reasons. First and foremost, regular cleaning helps to remove dirt, dust, and debris that can scratch the surface of the wood. Over time, these scratches can dull the appearance of your floors and make them look worn and aged.

Additionally, proper maintenance helps to preserve the finish of your hardwood floors. The finish acts as a protective layer, shielding the wood from moisture and stains. The finish can wear down without regular maintenance, leaving your floors vulnerable to damage.

Moreover, clean and well-maintained hardwood floors contribute to a healthier indoor environment. Dust and allergens can easily accumulate on unclean floors, leading to respiratory issues and allergies. By keeping your hardwood floors clean, you can improve the air quality in your home.

Common Errors in Hardwood Floor Cleaning That Should Be Avoided

Cleaning hardwood floors may seem straightforward, but there are common mistakes that homeowners often make. Here are some common mistakes that need to be avoided when cleaning hardwood floors:

Excessive Water Usage

Using too much water or wet mops can cause hardwood floors to warp and swell due to their natural susceptibility to moisture. It’s essential to minimise water exposure during cleaning to prevent damage.

Harsh Chemical Cleaners

Using strong chemical cleaners can strip the finish and harm the wood’s surface. Opt for gentle, pH-neutral cleaners specifically designed for hardwood floors to effectively clean without causing damage.

Improper Cleaning Tools

Using abrasive materials like steel wool or rough brushes can scratch and damage hardwood floors. Instead, choose soft microfiber cloths or mop pads that can effectively remove dirt and debris without harming the wood’s surface.

Neglecting Regular Maintenance

Failing to maintain a regular cleaning schedule can allow dirt and debris to accumulate on hardwood floors, leading to scratches and dullness over time. Regular sweeping or vacuuming, along with periodic deep cleaning, is crucial for preserving the beauty and longevity of hardwood floors.

Allowing Spills to Sit

Leaving spills or liquids on hardwood floors for an extended period can result in stains or damage to the finish. It’s essential to clean up spills promptly using a dry or slightly damp cloth to prevent any lasting effects on the wood.

Concrete Polishing Melbourne

Essential Tools and Supplies for Cleaning Hardwood Floors

To effectively clean your hardwood floors, you will need a few essential tools and supplies. Firstly, a high-quality broom with soft bristles is essential for sweeping away loose dirt and dust. Additionally, a vacuum cleaner with a floor brush attachment can be helpful for removing finer particles and pet hair.

For spot cleaning, a spray bottle filled with a mixture of water and a mild, pH-neutral hardwood floor cleaner is ideal. Microfiber cloths or mop pads should be used for both spot cleaning and regular mopping. These materials are gentle on the wood and effectively trap dirt and debris.

Lastly, investing in a microfiber dust mop or a dry mop specifically designed for hardwood floors is highly recommended. These mops are designed to attract and capture dust particles without scratching the surface of the wood.

Step-by-Step Guide to Cleaning Hardwood Floors

Now that we have covered the importance of cleaning and the essential tools let’s dive into a step-by-step guide on how to clean hardwood floors effectively:

  1. Start by removing loose dirt and dust using a broom or a vacuum cleaner with a floor brush attachment.
  2. For spot cleaning, spray a small amount of the hardwood floor cleaner onto a microfiber cloth or mop pad. Gently wipe the soiled area.
  3. For regular mopping, fill a bucket with warm water and add the recommended amount of hardwood floor cleaner. Dip the microfiber cloth or mop pad into the solution, making sure it is damp, not soaking wet.
  4. Squeeze out any excess water from the cloth or mop pad before beginning to mop the floor. Excessive water can damage the wood.
  5. Begin mopping the floor, working in small sections. Use a back-and-forth motion, following the grain of the wood.
  6. Rinse the cloth or mop pad frequently in the cleaning solution to ensure you are not spreading dirt around.
  7. Once you have finished mopping, allow the floor to air dry completely before walking on it.

Tips for Maintaining Hardwood Floors

In addition to regular cleaning, there are several tips you can follow to maintain the beauty and longevity of your hardwood floors:

  1. Place doormats at entryways to trap dirt and prevent it from being tracked onto your floors.
  2. Use furniture pads or felt pads under the legs of your furniture to prevent scratches and dents.
  3. Avoid wearing high heels or shoes with sharp objects on your hardwood floors, as they can cause significant damage.
  4. Trim your pet’s nails regularly to prevent scratches on the wood.
  5. Avoid exposing your hardwood floors to direct sunlight for prolonged periods, as it can cause fading and discolouration.
  6. Clean up spills immediately to prevent moisture from seeping into the wood and causing damage.

Understanding the Different Types of Hardwood Floor Finishes

Hardwood floors can have different types of finishes, each with its unique characteristics and maintenance requirements. The most common types of finishes include:

  1. Polyurethane: Polyurethane finishes are durable and resistant to water and stains. They require simple regular cleaning and occasional reapplication of the finish to maintain their protective properties.
  2. Oil-based finishes: Oil-based finishes provide a warm and natural look to hardwood floors. They require more maintenance than polyurethane finishes, including regular waxing and polishing to keep them looking their best.
  3. Water-based finishes: Water-based finishes are a popular choice for homeowners who prefer a low odour and fast-drying option. They require regular cleaning with mild cleaners and occasional reapplication of the finish.

Understanding the type of finish on your hardwood floors will help you determine the appropriate cleaning and maintenance routine.

How to Protect Hardwood Floors from Scratches and Damage?

Prevention is key when it comes to protecting your hardwood floors from scratches and damage. The following are some measures you can take: 


  1. Place rugs or mats in high-traffic areas to minimise wear and tear.
  2. Use furniture pads or felt pads under the legs of your furniture to prevent scratches.
  3. Avoid dragging heavy furniture across the floor. Instead, lift and carry it to its new location.
  4. Regularly trim your pet’s nails to prevent them from scratching the wood.
  5. Use floor protectors under chairs and table legs to prevent them from scratching the floor when moved.

By being proactive and taking these preventive measures, you can significantly reduce the risk of scratches and damage to your hardwood floors.

Professional Floor Polishing Services and Their Benefits

While regular cleaning and maintenance can go a long way in keeping your hardwood floors looking beautiful, professional floor polishing Geelong services can provide additional benefits. Floor polishing involves the use of specialised equipment and techniques to restore the shine and lustre of your hardwood floors. 

Professional floor polishing services offer numerous benefits for maintaining the integrity and aesthetics of your hardwood floors. Firstly, they delve deep into the surface, eliminating embedded dirt and grime that regular cleaning methods may miss. This thorough cleaning not only enhances hygiene but also prepares the floor for restoration.

 Moreover, floor polishing restores the lost shine that occurs over time due to wear and tear, rejuvenating the natural beauty of the flooring. Additionally, it effectively diminishes the appearance of scratches and minor damages, further enhancing the floor’s overall appearance. By incorporating protective coatings, floor polishing extends the lifespan of hardwood floors, ensuring their longevity and durability for years to come.

FAQs on Cleaning and Maintenance of Hardwood Floors:

  1. Why is excessive water usage harmful to hardwood floors?

Excessive water can cause warping and swelling of hardwood floors due to their susceptibility to moisture. It’s crucial to minimise water exposure during cleaning to prevent damage. Opt for damp mopping rather than soaking the floors.

  1. Can harsh chemical cleaners be used on hardwood floors?

No, harsh chemical cleaners should be avoided as they can strip the finish and harm the wood’s surface. It’s best to use gentle, pH-neutral cleaners specifically designed for hardwood floors to clean effectively without causing damage.

  1. Are abrasive cleaning tools safe for hardwood floors?

No, abrasive materials like steel wool or rough brushes can scratch and damage hardwood floors. Instead, choose soft microfiber cloths or mop pads that effectively remove dirt and debris without harming the wood’s surface.

  1. Why is neglecting regular maintenance harmful to hardwood floors?

Neglecting regular cleaning allows dirt and debris to accumulate on hardwood floors, leading to scratches and dullness over time. Regular sweeping or vacuuming, along with periodic deep cleaning, is crucial for preserving the beauty and longevity of hardwood floors.

  1. How should spills be handled on hardwood floors?

Spills should be cleaned up promptly using a dry or slightly damp cloth to prevent staining or damage to the finish. Leaving spills or liquids on hardwood floors for an extended period can result in stains or damage to the finish, so immediate action is essential.

Conclusion: Keeping Your Hardwood Floors Looking Beautiful

Proper cleaning and maintenance are essential to keep your hardwood floors looking beautiful and maintaining their longevity. By following the tips and insights shared by a floor polishing Geelong expert, you can ensure that your hardwood floors remain a stunning focal point in your home.

 From understanding the different types of finishes to using the right tools and techniques, taking care of your hardwood floors is a rewarding investment. So, start implementing these tips today and enjoy the timeless elegance of your hardwood floors for years to come.

Remember, your hardwood floors deserve the best care with Total Floor Service. So why wait? Experience the Total Floor Service difference today and give your hardwood floors the care they deserve!

Tile Cleaning Melbourne

How Do You Clean Polished Concrete Floors: Tips From Floor Polishing Expert

Whether you have recently installed polished concrete flooring or are looking for ways to preserve the shine of your existing floors, this guide will provide you with valuable tips and techniques.
In this blog, we will cover everything from understanding the basics of floor polishing Geelong concrete to choosing the right cleaning solutions and mopping techniques. So, let’s dive in and discover how you can keep your polished concrete floors looking their best!

1. Understanding the Basics of Polished Concrete

Polished concrete is a popular flooring option that involves grinding a concrete surface to achieve a smooth, shiny finish. This process involves multiple steps and the use of diamond tools and polishing compounds. The end result is a durable, low-maintenance flooring option that offers numerous benefits over traditional concrete.

Some of the benefits of polished concrete flooring include:

Enhanced durability: Polished concrete floors are highly resistant to wear and tear, making them ideal for high-traffic areas.

 Easy maintenance: Polished concrete floors are easy to clean and require minimal maintenance compared to other flooring options.

Improved aesthetics: The glossy finish of polished concrete floors adds a touch of elegance to any space.

Decking Restoration Melbourne

Sustainable and Eco-Friendly:Polished concrete is an environmentally friendly flooring option. The process involves repurposing existing concrete surfaces, eliminating the need for additional materials.

Cost-Effective Long-Term Investment -While the initial cost of floor polishing Geelong concrete floors may seem higher than some alternatives, it proves to be a cost-effective long-term investment. 

Polished concrete is different from regular concrete in terms of appearance and finish. While regular concrete can be rough and prone to dusting, polished concrete has a smooth surface that reflects light, giving it a glossy appearance.

2. Regular Dusting to Preserve Shine

Regular dusting is essential for maintaining the shine of polished concrete floors. Dust and dirt can dull the surface over time, so it’s important to remove them regularly.

To effectively dust your polished concrete floors, you can use a soft-bristle broom or a microfiber dust mop. These tools are gentle on the surface and help to trap dust particles instead of spreading them around. Avoid using traditional brooms with stiff bristles, as they can scratch the surface of the floor.

When dusting, make sure to cover the entire floor, including corners and hard-to-reach areas. This will prevent the accumulation of dirt in these areas, which can be difficult to clean later on.

3. Choosing the Right Cleaning Solutions

When it comes to cleaning polished concrete floors, it’s important to choose the right cleaning solutions. pH-neutral cleaners are recommended for polished concrete, as they are gentle enough to remove dirt and grime without damaging the surface.

Avoid using harsh chemicals, such as bleach or ammonia, as they can strip away the protective layer of the floor and cause discolouration or etching. Additionally, avoid using abrasive cleaners or scrub brushes, as they can scratch the surface of the floor.

If you prefer to make your own cleaning solution, you can mix warm water with a small amount of mild dish soap or a pH-neutral floor cleaner. Alternatively, you can opt for commercial cleaners specifically designed for polished concrete floors.

4. Mopping Techniques for Best Results


In addition to regular dusting, mopping is an important part of cleaning polished concrete floors. Proper mopping techniques help to remove any remaining dirt and grime, leaving the surface clean and shiny.

To mop your polished concrete floors effectively, you will need a microfiber mop or a cotton mop with a microfiber mop head. Microfiber mops are highly recommended for polished concrete, as they are gentle on the surface and can effectively trap dirt and debris.

Before mopping, sweep or vacuum the floor to remove any loose dirt and dust. This will prevent scratching the surface while mopping. Then, dampen the mop with the chosen cleaning solution and wring out any excess liquid. Avoid using excessive water, as it can seep into the concrete and cause damage.

Use a back-and-forth motion while mopping the floor in small portions. To guarantee complete cleaning, make sure to slightly overlap each stroke. Rinse and wring out the mop as needed to prevent the spreading of dirty water on the floor.

5. Dealing with Stubborn Stains

Despite regular cleaning, polished concrete floors can occasionally develop stubborn stains. The key to effectively removing stains is to address them promptly and use the appropriate cleaning techniques.

Common types of stains on polished concrete floors include oil, wine, ink, and food stains. Here are some spot-cleaning techniques for various types of stains:

Oil stains: Absorb the excess oil with a cloth or paper towel. Then, apply a poultice made from a mixture of baking soda and water or a commercial oil stain remover. Leave the poultice on the stain for a few hours, then rinse and mop the area.

Wine stains: Blot the stain with a clean cloth or paper towel to remove any excess liquid. Then, mix a solution of warm water and mild dish soap or a pH-neutral floor cleaner. Gently scrub the stain with a soft-bristle brush or a sponge. Rinse the area thoroughly and mop as usual.

 Ink stains: Dampen a clean cloth with rubbing alcohol or acetone. With caution, to avoid spreading the stain, gently dab the area. Rinse the area with warm water and mop as usual.

For stubborn stains that cannot be removed using spot cleaning techniques, you can try using a commercial stain remover or poultice. Follow the instructions provided by the manufacturer for best results.

6. Addressing Spills Promptly

In addition to dealing with stains, it’s important to address spills promptly to prevent them from seeping into the concrete and causing staining or damage. Whether it’s water, coffee, or any other liquid, immediate cleanup is crucial.

Quick tips for spill cleanup on polished concrete floors:

  • To absorb the liquid, blot the spill with a fresh cloth or paper towel. 
  • Keep your hands off the spill to prevent additional spreading.
  • Rinse the area with warm water and mop as usual to remove any remaining residue.
  • If the spill has left a stain, follow the appropriate spot-cleaning techniques mentioned earlier.

By addressing spills promptly, you can minimise the chances of permanent staining or damage to your polished concrete floors.

7. Avoiding Abrasive Tools

When cleaning polished concrete floors, it’s important to avoid using abrasive tools that can scratch or damage the surface. This includes scrub brushes with stiff bristles, scouring pads, or any other abrasive cleaning tools.

Instead, opt for gentle cleaning tools and methods that won’t harm the surface. Microfiber mops, soft-bristle brushes, and non-abrasive cleaning cloths are suitable for cleaning polished concrete floors.

For tough stains or dirt removal, consider using alternative tools and methods. For example, you can use a soft-bristle brush attached to a low-speed floor buffer for more stubborn stains. Make sure to use the appropriate cleaning solution and follow the manufacturer’s instructions for best results.

8. Adding a Protective Sealant

Applying a protective sealant to your polished concrete floors can help to enhance their durability and maintain their shine. A sealant acts as a barrier, preventing liquids and stains from penetrating the surface of the concrete.

The benefits of applying a protective sealant to your polished concrete floors include:

Increased stain resistance: Sealants create a protective barrier that makes it easier to clean up spills and prevents staining.

Enhanced durability: Sealants help to protect the surface of the concrete from wear and tear, extending the lifespan of your floors.

Improved gloss retention: Sealants can help preserve the shine of your polished concrete floors, keeping them looking their best for longer.

There are different types of sealants available for polished concrete floors, including topical sealers and penetrating sealers. Topical sealers sit on the surface of the concrete and provide a glossy finish while penetrating sealers penetrate the concrete to provide protection without altering the appearance.

Before applying a sealant, make sure to thoroughly clean and dry the floor. Follow the manufacturer’s instructions for the specific sealant you choose, as application methods can vary.

9. Regular Maintenance Checks

Regular maintenance checks are essential for keeping your polished concrete floors in top condition. By checking for signs of damage or wear, you can address any issues before they become more serious.

The frequency of maintenance checks will depend on factors such as the amount of foot traffic and the general condition of your floors. However, it is recommended that maintenance checks be performed at least once a month.

During maintenance checks, look out for the following signs of damage or wear:

  • Cracks or chips in the concrete surface
  • Discolouration or fading
  • Uneven or rough patches
  • Loss of shine or gloss

If you notice any of these issues, you can take some DIY maintenance steps to address them. For example, you can patch minor cracks or chips with a concrete patching compound or use a diamond polishing pad to restore the shine to dull areas.

However, there may be instances where professional assistance is required. If you are unsure how to address a particular issue or if the damage is extensive, it’s best to consult with a professional floor polishing Geelong service.

10. Professional Polishing Services

While regular cleaning and maintenance can go a long way in preserving the shine of your polished concrete floors, there may be times when professional polishing services are needed.

Consider professional polishing services in the following situations:

Deep scratches or extensive damage: If your polished concrete floors have deep scratches or other extensive damage, professional polishing can help restore the surface to its original condition.

Complete floor renovation: If your polished concrete floors have lost their shine or have become dull over time, professional polishing can rejuvenate the surface, giving it a fresh and glossy appearance.

Time constraints: If you don’t have the time or resources to maintain your polished concrete floors on your own, hiring professionals can ensure that your floors are properly maintained and cleaned.

Stain Removal -For stubborn stains or contaminants that ordinary cleaning methods can’t tackle, professional polishing provides the expertise needed. Experts employ advanced techniques and products to effectively remove deep-seated stains, restoring the floor’s pristine look.


 Safety Enhancement- Professional polishing improves aesthetics and reduces slip resistance. This is especially important in commercial or high-traffic areas where maintaining a safe environment is paramount. Polishing treatments can add a layer of protection, reducing the risk of slips and falls.

When hiring professional polishing services, make sure to do your research and choose a reputable company with positive reviews and a track record of quality work.

Conclusion:

Cleaning and maintaining polished concrete floors doesn’t have to be a daunting task. By understanding the basics, choosing the right cleaning solutions, and following the recommended techniques, you can keep your floors looking beautiful for years to come. 

Remember to address spills promptly, avoid abrasive tools, and consider adding a protective sealant. Regular maintenance checks are essential but don’t hesitate to seek professional polishing services when needed. With these tips from our floor polishing Geelong expert, you can confidently clean and preserve the shine of your polished concrete floors.

Elevate the brilliance of your space with Total Floor Service! Discover expert tips on how to clean polished concrete floors and explore our premier floor polishing services. Illuminate your floors today with our floor polishing and sanding services.

Floor Sanding Melbourne

Refinish Hardwood Floors & Sanding: The Best Way to Restore Your Floors’ Beauty

A timeless and elegant option for any house is hardwood floors. As they add warmth, elegance, and value to a space. However, over time, these floors can become worn, scratched, and faded, losing their original beauty. This is where the importance of hardwood Floor Sanding Melbourne and refinishing comes into play. Refinishing hardwood floors not only restores their natural beauty but also protects them from further wear and tear, extending their lifespan. 

In this blog post, we will explore the reasons why refinishing hardwood floors is essential, the advantages of choosing hardwood floor refinishing over other options, the step-by-step process of refinishing hardwood floors, the pitfalls of DIY refinishing, and the benefits of hiring professionals for this task.

I. Importance of Refinish Hardwood Floors

  1. Restoration of Beauty and Elegance:

 Over time, hardwood floors can become worn, scratched, and dull due to regular foot traffic and exposure to the elements. Refinishing hardwood floors restores their original lustre and beauty, bringing out the natural grain and colour, and making your space look more elegant and inviting.

  1. Enhanced Durability and Longevity:

 Refinishing not only improves the aesthetics but also reinforces the durability of your hardwood floors. It adds a protective layer that helps to prevent further damage and extends the lifespan of your flooring, saving you money on expensive replacements.

  1. Improved Indoor Air Quality: 

Older, worn hardwood floors can harbour dust, allergens, and contaminants in the cracks and crevices. Refinishing involves sanding and sealing, which eliminates these hiding places for allergens, leading to improved indoor air quality and a healthier living environment.

  1. Increased Property Value: 

Well-maintained and beautifully refinished hardwood floors are a major selling point for homes. They can significantly increase the resale value of your property, attracting potential buyers and making your home more appealing in the real estate market.

  1. Cost-Effective Alternative to Replacement:

 Refinishing is a cost-effective solution compared to the expensive and time-consuming process of replacing hardwood floors. It allows you to enjoy the benefits of a “new” floor without the need to tear up and dispose of the old one, saving both time and money.

II. Why Choose Hardwood Floor Refinishing?

When it comes to rejuvenating hardwood floors, refinishing is undoubtedly the best option. There are several advantages to choosing wood floor sanding Melbourne and refinishing over other alternatives, such as carpeting or laminate flooring.

Floor Sanding Melbourne

One of the primary advantages of refinishing hardwood floors is cost-effectiveness. While replacing floors entirely can be a significant expense, refinishing offers a more budget-friendly solution. Refinishing allows homeowners to enhance the appearance of their floors without the need for a full replacement, saving both money and time.

Additionally, refinishing hardwood floors provides customisation options. Homeowners can choose from a wide range of stains, finishes, and sheens to achieve their desired look. Whether one prefers a light and natural finish, a rich and dark stain, or a trendy grey-toned finish, refinishing allows for endless possibilities in terms of design and personal style.

Moreover, refinishing allows for the preservation of the original hardwood floors. Many older homes boast beautiful, solid hardwood floors that are irreplaceable. Refinishing these floors not only restores their beauty but also preserves their historical and architectural value. It is a way to honour the craftsmanship and history of the home while adding a touch of modernity.

III. Refinishing Hardwood Floors Process

If you decide to refinish your hardwood floors, it is essential to understand the step-by-step process involved. While it is possible to tackle this project as a DIY endeavour, it requires careful attention to detail and the use of specialised equipment. However, it’s often better to hire a professional for the job to ensure a high-quality and hassle-free outcome. Here is a guide to help you through the refinishing process:

  1. Preparing the area: Before starting the refinishing process, clear the area of furniture, rugs, and other objects. This will allow for easier access to the floors and prevent any damage to your belongings. Use protective coverings to shield adjacent rooms and surfaces from dust and debris.
  1. Sanding: Sanding is a crucial step in refinishing hardwood floors. It helps to remove the old finish, scratches, and imperfections, revealing the fresh layer of wood underneath. Proper sanding techniques and equipment are essential to achieve a smooth and even surface. Start with coarse-grit sandpaper to remove the old finish and any deep scratches. Gradually work your way up to finer-grit sandpapers to smooth out the wood.
  1. Staining: Once the sanding process is complete, you have the option to stain the wood. Staining adds colour and depth to the hardwood floors, enhancing their natural beauty. When choosing a stain, consider the overall aesthetic you want to achieve and test it on a small inconspicuous area first. Apply the stain uniformly using a brush or cloth, as directed by the manufacturer. Give the stain the time it needs to fully enter the wood before removing any excess.
  1. Applying finish: After the staining process, it is time to apply the finish. There are various types of finishes available, including oil-based polyurethane, water-based polyurethane, and wax. Each has its advantages, such as durability, ease of application, and drying time. Consider your lifestyle and the level of foot traffic the floors will experience when selecting a finish. Apply the finish using a brush or roller, following the manufacturer’s guidelines. Apply many layers, letting each coat completely dry before adding the next. 
  1. Drying and curing: Once the finish has been applied, it is essential to allow sufficient time for drying and curing. This process can take several days, depending on the type of finish used. Avoid walking on the floors or placing furniture until they are completely dry and cured. This will ensure a beautiful and long-lasting finish.

IV. The Pitfalls of DIY Refinishing Hardwood Floors

While refinishing hardwood floors can be a rewarding DIY project, it is important to be aware of the potential pitfalls that can arise. Here are some common challenges individuals face when attempting to refinish hardwood floors themselves:

  1. Improper sanding techniques: Sanding requires skill and patience. Using the wrong sandpaper grit or applying too much pressure can result in uneven sanding, leaving visible marks and imperfections on the floors. It is essential to familiarise yourself with proper sanding techniques and use the appropriate equipment to achieve a smooth and even surface.
  1. Uneven staining: Staining requires precision and attention to detail. Uneven application or over-application of stain can result in blotchy or dark spots on the floors. It is crucial to follow the manufacturer’s instructions and test the stain on a small area before applying it to the entire floor.
  1. Inadequate application of finishes: Applying finishes requires a steady hand and even strokes. Uneven application or missed spots can result in an inconsistent appearance and reduced durability. It is also important to apply multiple coats of finish to ensure proper protection and longevity.
  1. Expensive tools and equipment rentals: Refinishing hardwood floors requires specialised tools and equipment, such as sanders, buffers, and applicators.Asproject’s total cost may increase if these tools are purchased or rented. Additionally, improper use of these tools can lead to further damage to the floors.
  1. Time-consuming process: DIY hardwood floor refinishing is a time-consuming endeavour. It often takes much longer for beginners to complete the project compared to professional refinishing services. This extended timeline can disrupt your daily life and may not be ideal for those with busy schedules or limited time to spare.

V. Benefits of Professional Hardwood Floor Refinishing

While DIY refinishing can be a fulfilling project, there are numerous benefits to hiring professionals for hardwood floor sanding Melbourne and refinishing. Here are some advantages of entrusting this task to the experts:

  1. Expertise and assessment: Professionals have extensive knowledge and experience in assessing the condition of hardwood floors. They can identify any underlying issues, such as water damage or structural problems, and recommend appropriate treatments. Their expertise ensures that the refinishing process is tailored to the specific needs of the floors.
  1. High-quality materials and advanced equipment: Professionals have access to high-quality materials and advanced equipment that yield superior results. They are familiar with the latest products and techniques in the industry and can recommend the best options for your floors.
  1. Time-saving and stress-reducing: Refinishing hardwood floors is a time-consuming and labour-intensive process. Hiring professionals allows you to save valuable time and energy, as they handle all aspects of the project. They ensure that the refinishing process is completed efficiently and with minimal disruption to your daily life.
  1. Flawless finish and long-lasting results: Professional refinishing guarantees a flawless finish. With their expertise and attention to detail, professionals can achieve a smooth, even surface, and consistent application of stains and finishes. Their workmanship ensures that the floors look beautiful and are protected for years to come.
  1. Customisation and design expertise: Professionals can offer valuable insights on the customisation and design options available for your hardwood floors. They can help you choose the right stain colours and finishes to achieve your desired aesthetic, enhancing the overall look of your space.

Conclusion:

In conclusion, refinishing hardwood floors is a worthwhile investment that restores the beauty and longevity of these timeless and elegant floors. Whether you choose to undertake this project yourself or hire professionals, the results will be well worth the effort. We encourage you to consider professional hardwood floor sanding Melbourne refinishing for optimal results.

 Restore the timeless beauty of your hardwood floors with Total Floor Service’s expert sanding and refinishing. Contact us today for a floor transformation that will leave you in awe