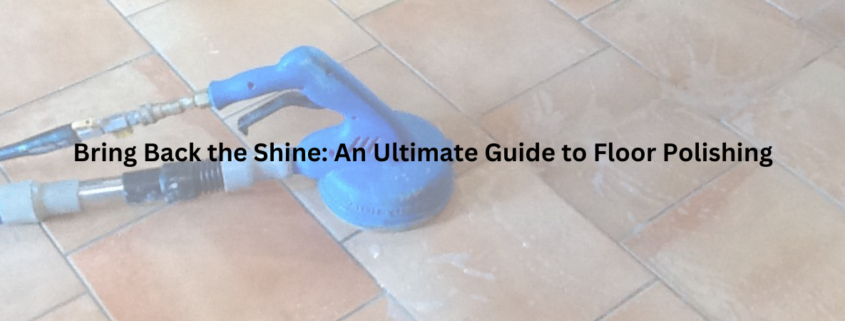
Bring Back the Shine: An Ultimate Guide to Floor Polishing
So your hardwood or linoleum floors are looking dull and worn, huh? Don’t fret; it happens to the best of us. Life gets busy, and before you know it, your once gleaming floors look lacklustre. But a little elbow grease and the right products can bring back that shine and lustre in no time. floor polishing Geelong and buffing your floors may seem tedious, but the results are well worth it.
Your space will look cleaner, fresher and more put together. Not to mention, polished floors are easier to sweep and mop, so your weekly cleaning routine will be a breeze. Ready to roll up your sleeves and dive in? This guide will walk you through everything you need to know to make your floors sparkle like new again. By the time you’re done, your floors will be glowing, and you’ll feel a sense of accomplishment at reviving their beauty. Let’s get started!
The Benefits of Polishing Your Floors
Polishing your floors is well worth the effort. Here are a few reasons why:
A shiny floor makes a great first impression. Whether it’s visitors at your front door or potential homebuyers, a gleaming floor conveys care and quality.
Polishing protects your flooring investment. By buffing out surface scratches and imperfections, you shield your floors from damage and keep them looking their best. This helps ensure many years of enjoyment from your flooring.
Less dirt and grime stick to polished floors. The smooth, glossy surface prevents buildup, so your floors stay cleaner between deep cleanings. Easy wipe-ups with a dust mop or damp mop are often all you need.
Floor Polishing Geelong can even out the appearance of some floors. For wood, stone or concrete floors with natural variations in tone or pattern, a coat of polish helps create an evenly finished look.
A polished floor is easier to maintain. Once you’ve put in the initial work to buff and shine, keeping floors clean and bright with regular damp mopping and occasional re-polishing is a breeze.
So put in the effort to bring back the shine to your floors. The rewards of polishing are well worth it for appearance, protection, easy cleaning and simplified maintenance. Your floors will thank you, and so will your visitors for years to come!
Tools and Equipment You’ll Need
To get your floors gleaming again, you’ll need to gather the proper tools and supplies.
First up, a good floor polish or restorer. Look for a product for your floor type – wood, laminate, stone or tile. Water-based polishes are easy to use and clean up, while paste waxes can provide extra protection. For stubborn stains or heavy-duty jobs, a commercial-grade polish may be needed.
You’ll also want protective gear like gloves, knee pads and old clothes you don’t mind getting dirty.
Essentials:
-A mop, sponge or floor-cleaning pads
-A bucket
-Rags, towels or floor cleaning cloths
-A scrub brush for tough stains
-A pole sander or floor buffing pad for larger areas
-Painter’s tape for protecting baseboards and trim
-A vacuum cleaner for thoroughly cleaning floors beforehand
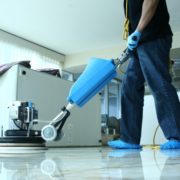
Once you have everything ready, clear the area by removing furniture and rugs. Vacuum, sweep and mop the floor to remove built-up dirt and grime. Tape off any adjacent surfaces you want to protect. Apply your chosen polish with a mop, sponge or floor cleaning pad and buff thoroughly.
Let the floor dry as directed, then admire your handiwork!
With the proper tools, technique and a little elbow grease, you’ll have your floors shining and new again soon. Keep up regular maintenance with sweeping, vacuuming and damp mopping to keep your floors gleaming for years.
How to Prepare Your Floors for Polishing
Before making your floors shine again, you need to prepare them properly. Follow these steps to get your floors ready for polishing:
Clean and Sweep
The first step is to thoroughly sweep or vacuum your floors to remove dirt or debris. Use a broom, dustpan and brush, or vacuum with the proper hard floor attachment to pick up dust, crumbs, and grit.
Mop and Scrub Any Stains
For stuck-on messes or stains, you may need to mop or scrub the area to remove them. Use a commercial hard floor cleaner or a solution of warm water and white vinegar or dish soap. Scrub any spots with an abrasive sponge or scrubber. Rinse well with water to remove any remaining residue. Allow the floors to dry completely.
Fill Any Gouges or Cracks
Inspect your floors closely for any gouges, scratches or cracks and fill them in. Use a wood filler for hardwood floors or a concrete patch compound for stone floors. Let the filler dry as directed, then sand the area smooth. Vacuum away dust with a soft brush attachment.

Wipe Away Buildup
Over time, floor finishes and sealers can build up, creating an uneven surface. Use mineral spirits or lacquer thinner and fine-grade steel wool to rub away any buildup gently. Work in small sections, wiping away residue with a tack cloth as you go. Allow the area to dry before polishing.
Protect Surrounding Areas
Place painter’s tape around the room’s edges and any trim to protect them from splatters or drips. Lay drop cloths over any baseboards or furniture that cannot be moved. Remove outlet and vent covers and cover the openings to prevent polish from dripping. Carefully follow the directions when applying your chosen floor polish to avoid creating more mess to clean up!
With some minor cleaning and prep work, you’ll have your floors gleaming again. Take your time and be thorough—the results will be well worth the effort.
Polishing Wood Floors: Step-by-Step Instructions
Now that you have the right supplies and have prepared the floor, it’s time to restore the shine. Follow these steps to polish your wood floors:
- Vacuum and damp mop the floor to remove any dirt or debris. Make sure the floor is clean and dry before polishing.
- Apply the polish or wax you choose evenly and liberally across the floor using a wax applicator pad, lambswool applicator, or waxing brush. Work with the grain of wood using smooth strokes.
- Let the polish dry as directed. This usually takes 30 minutes to 2 hours. Keep foot traffic off the floor during this time.
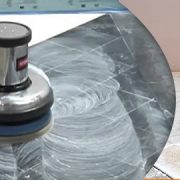
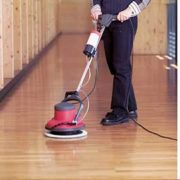
- Once dry, use a buffing or polishing brush to spread further and buff the polish. Move the buffer using light, overlapping circular motions. Work slowly across the entire floor.
- Apply additional coats of polish for enhanced protection and sheen. Make sure each coat is dry before applying the next. Two to three coats are typical for most wood floors.
- Protect your work by placing furniture sliders under chairs and table legs and area rugs over high-traffic zones. Limit foot traffic as much as possible for 24 to 48 hours.
- Perform regular maintenance to keep floors shining. Sweep, vacuum and damp mop as needed. Re-polish every six months to a year using the same products and techniques.
With some elbow grease and patience, you can bring back the beautiful shine to your wood floors. Take your time and work carefully through each step. Your efforts will be well worth it when you see your gleaming floors and the whole room brighten up. Keep up with regular polishing, and your floors will look as glossy and pristine as the day they were installed.
Tips for Maintaining Your Polished Floors
To keep your freshly polished floors shining bright, follow these tips:
Clean up spills immediately
As tempting as it may be to put off mopping up that spilled juice or wiping away muddy footprints, take care of messes immediately. The longer they sit, the more opportunity they have to dull your floor’s shine. Keep a microfiber cloth or dust mop handy for quick cleanups.
Use protective pads
Place felt pads, sliders, or protective caps under the legs of heavy furniture like tables, chairs, and appliances. This prevents scratches and scuffs from dragging furniture across the floor. For extremely heavy pieces, you may consider furniture sliders or coasters.
Vacuum and sweep often
Dirt, grit, and debris act like sandpaper on polished floors. Vacuum carpets, rugs, and bare floors frequently with the proper attachment to pick up dirt and dust. Use a soft bristled broom or dust mop for sweeping hard floors. Pay extra attention to entryways where outside dirt and sand tend to build up.
Limit direct sunlight
While natural light is great for your home, too much direct sunlight can cause floors to fade, dull, and lose their shine over time. Use curtains, blinds, or solar shades to block sunlight during the peak hours of the day. This is especially important for floors with a wood, cork or linoleum material.
Re-polish as needed
How often you need to re-polish depends on the type of flooring material and the amount of traffic or wear and tear. As a general rule, most floor polishing Geelong will need another coat of polish every 6-18 months to maintain an even sheen. Look for signs like dull spots, scuffs that won’t buff out, or water no longer beading on the surface. When re-polishing, always follow the directions for your specific flooring product.
By following these useful tips, you’ll keep your polished floors glistening like new for years to come. Stay on top of regular maintenance and your floors are sure to shine bright!
Conclusion
So there you have it, a few steps to bring back the shine to your floors. While it may require some elbow grease, taking the time to properly clean, buff, and protect your floors will make a world of difference in your home. Your floors are the foundation that ties each room together, so show them some love and attention. Once you see the results, you’ll be glad you put in the effort. Now go grab your supplies, turn on some tunes, and get ready to slide around in your socks on freshly polished floors. Experience excellence with Total Floor Service. Our dedicated team provides top-notch onsite floor care solutions, catering to all your needs. Trust us for a seamless and transformative experience, leaving your space with a lasting impression.



 Address:
  Phone:
  ABN: 63 602 512 489


