Your Ultimate Guide to DIY Concrete Floor Polishing
Polished concrete floors are becoming more popular in residences these days.
One big reason for their popularity is that they last a very long time. Unlike tiled floors that might need replacing every 10 to 20 years, polished concrete floors can last for decades. They’re also easy to take care of and look really nice. Plus, their durability saves you money in the long run.
If you want to keep your polished concrete floors looking shiny, you can either hire concrete polishing Melbourne professionals or do it yourself. If you’re considering the DIY concrete floor polishing, here is all the information you need to get the job done right.
Just like other specialised skills, like cutting concrete, drilling holes, or sawing through it, concrete polishing is a step-by-step process that requires the right tools and equipment for the best results.
To get you started, let’s go over the basics of concrete polishing.
What is Concrete Polishing?
Concrete polishing is a detailed process for making concrete surfaces look attractive, durable, and functional. It involves using specialised tools and diamond abrasives to grind, smooth, and shine the concrete.
The process begins by roughly grinding the concrete to remove any coatings or stains. Then comes several rounds of grinding to make the surface smoother and reveal the concrete’s natural look. After that, honing is conducted to treat any visible scratches.
Once the grinding and honing are done, the concrete is polished with diamond resin pads. This makes it super glossy and reflective. The final polishing step makes the concrete look really attractive and appealing, increasing your property’s value.

DIY Concrete Polishing Step-by-Step Process
As you know the basics of concrete polishing now, let’s move further towards the DIY concrete floor polishing process. Firstly, gather some important equipment like:
- Diamond disc grinder
- Various grit discs
- Concrete sealer
- Spray pump
- Microfiber mop
The DIY concrete polishing process is easy to understand. Just follow here mentioned steps, and you will be on your way to a visually appealing space.
Conduct a Hardness Test
To determine how hard the concrete is, use a Mohs pick and scratch test kit as instructed by the manufacturer. This test will place the concrete on the Mohs hardness scale, helping you determine the right grit level needed.
For the best results, stick to using grinding pads from the same manufacturer. Each manufacturer has its own rating system for rating the pads with concrete hardness levels.
Prepare the Surface
The amount of preparation needed depends on the floor’s current condition and the method you choose for polishing. Whether you’re polishing an existing concrete floor or adding a concrete overlay, the preparation steps generally remain consistent:
- Clear away dirt and dust through sweeping and mopping.
- Eliminate existing concrete sealers by grinding, scraping, or applying a chemical seal remover.
Repair Cracks and Holes
Start thoroughly cleaning the concrete surface and watch for any cracks or holes. If you find any gaps, follow these steps to address them and ensure a level surface.
To fix cracks or holes, you’ll need tools such as a trowel, sponges, float paddles, and materials like epoxy, grout, or a similar semi-rigid filler. These steps are essential to maintain the desired consistency of the final finish.
Additionally, check if there are any expansion joints. If you spot any, make sure to clean, repair, and fill them properly to complete the repair process.
Grind the Surface
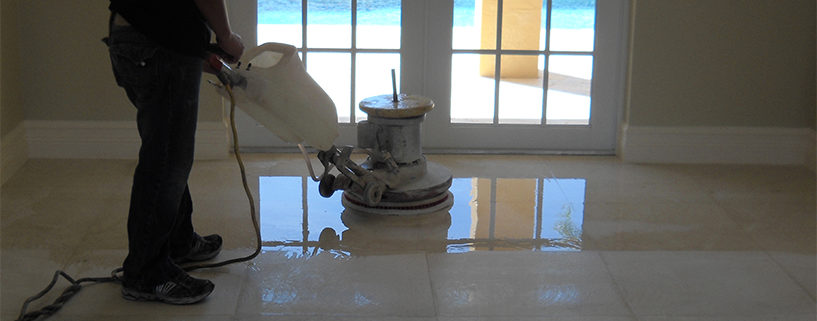
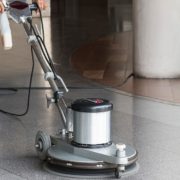
Once you’ve prepped the floor, it’s time to bring out the grinder. Begin with a coarse-grit (40- or 50-grit) grinding disc, selecting the appropriate one based on the concrete’s hardness. Start the concrete grinder in a circular motion, starting from one side of the room and slowly working your way to the opposite side.
Ensure a slight overlap in the passes made with the grinder to prevent any uncovered areas. Some concrete polishers suggest pouring water ahead of the grinder to cool down the grinding discs and prevent them from becoming dull or glazed.
Pro Tip: For square edges, you might require an edging grinder to finish the floor. And for a smaller project, opt for a hand grinder instead of a walk-behind concrete grinder.
Refine the Surface with Finer Grit
After you’ve done the initial round of polishing with a coarse-grit disc, it’s important to keep going with more passes using finer grits. How many passes you need will depend on how hard the concrete is, the floor condition, and how polished you want it to be.
As a standard rule, the grit you use in each pass should be at least twice as smooth as the one before it. For example, if you started with the rough 40-grit disc, the next round should use a smoother 80- or 100-grit disc, followed by an even smoother 160- or 200-grit in the next round, and so on.
Use a Concrete Densifier
A concrete densifier is a special chemical hardener that makes concrete floors stronger and more durable. It also helps to reduce dust and improves the shape of the surface.
To use it, one person should spray the hardener on the floor while another person uses a microfiber mop to spread it evenly. Sometimes, the hardener might become thick or gather in one spot. If this happens, you can either use the mop again to spread it out smoothly or add a bit of water to that area to help it soak into the concrete.
Polish the Surface
This is the final stage of the DIY concrete polishing process. Once you’ve finished using diamond pads with various grits to polish the floor and the applied densifier has thoroughly dried, proceed to polish the entire surface with the finest resin pads to complete the polishing procedure.
The selection of the grit level should depend on the current state of your concrete floors and the desired outcome. Opting for a higher grit level will result in a shinier finish.
Apply Concrete Sealer
Once you’ve achieved your desired level of polish on the concrete surface, it’s essential to protect it by applying a concrete sealer. This protective layer will safeguard your concrete from oil, water, and stains, ensuring the longevity of its polished appearance.
To apply the sealer, pour the right amount into a spray pump and mix it with water as directed by the manufacturer. Then, spray the sealer on the concrete and use a microfiber mop to spread it evenly. Work on one area at a time, rather than covering the entire floor at once, to ensure the sealer sets evenly.
By doing this, you’ll protect your polished concrete, making it last longer and keeping it free from unsightly stains.
Bonus Tip: Hire Professionals
While you know the concrete floor polishing process, a DIY approach is not always beneficial. As the process requires costly tools and takes too much time, you should consider relying on concrete polishing Melbourne professionals for the job.
Additionally, the hardness of the floors and climate conditions will affect your polishing process. So, you must only take the initiative once you are confident enough in your DIY skills.
Hiring professionals might seem costly, but it’s beneficial and cost-effective in the long run. Professionals can help you achieve the desired results and increase the durability of your concrete floors by using the right pad grits, densifier, and sealer.
Conclusion
So, now you are well-informed and prepared to start your journey towards polished and visually appealing concrete floors.
Polishing your concrete floors in timely intervals can give your home an elegant look and boost your property’s overall value. So, consider making a polishing routine for your floors because a small investment in home improvement made today can add incredible value to your home and aesthetics.
And if you don’t have the right expertise or time for DIY concrete floor polishing, consulting concrete polishing Melbourne experts is always a good option. For exceptional results and truly attractive floors, consider Total Floor Service as your trusted partner. Our experts boast years of experience in floor sanding & polishing, so we can handle any project regardless of its complexity. Reach out to our team, and let us give your floors the shine and care they deserve!



 Address:
  Phone:
  ABN: 63 602 512 489


