7 Proven Methods for Tile Cleaning After Grouting
Many homeowners face the challenge of keeping tiles clean and sparkling, whether it’s a newly tiled bathroom floor or a kitchen backsplash that has just been grouted.
The grouting process can leave behind a stubborn haze that dulls the appearance of the tiles. Addressing this issue promptly and effectively with Tile Cleaning Melbourne methods is crucial.
This comprehensive guide dives deep into seven proven methods for cleaning tiles after grouting, ensuring that your tiles remain the centerpiece of your home’s aesthetic appeal.
So, let’s dive right in and explore how to keep your tiles immaculate and make them the highlight of your home’s design.
Preparing Your Tiles for Cleaning
A successful cleaning session starts with proper preparation. Begin by removing any loose debris from the tiled area.
A soft brush or a vacuum cleaner can be effective in doing so. Gathering the right tools and materials is the next step.
Arm yourself with rubber gloves, a soft cloth or sponge, a scrub brush suitable for tiles, and a bucket. Preparing your workspace and having your tools ready will streamline the cleaning process, making it efficient and hassle-free.
Method 1: Using Vinegar Solution
Vinegar is celebrated for its cleaning prowess, thanks to its acidity which cuts through grime and haze with ease. Mix one part white vinegar with four parts water to use this method. Apply this solution with a sponge, covering the tiles evenly.
Let it sit for a few minutes to break down the grout haze, then rinse off with clean water. While effective for most tile types, it’s advisable to avoid vinegar on natural stone as it can cause etching.
Method 2: Baking Soda Paste
Facing tougher stains? A baking soda paste might be your best bet. Create a thick paste by mixing baking soda with water. This paste can be directly applied to the tiles and grout lines. Using a soft brush, gently scrub the area to lift off the stains.
Afterwards, rinse the tiles thoroughly with water. This method is effective in cleaning and leaves your tiles smelling fresh and clean.
Method 3: Commercial Grout Cleaners
Commercial grout cleaners offer a viable solution for those seeking a more straightforward approach. These products are specifically formulated to tackle grout haze and stains. When selecting a cleaner, ensure it’s compatible with your tile type.
Following the manufacturer’s instructions is key to avoiding damage. Use in a well-ventilated area and protect your hands with gloves for safety.
Method 4: Steam Cleaning
Steam cleaning is an eco-friendly and efficient method for tile and grout maintenance. It uses high-pressure steam to penetrate grime and dirt, lifting it from the tiles and grout without the need for chemicals.
While not everyone owns a steam cleaner, renting one can be a cost-effective way to achieve professional-level cleanliness.
Method 5: Peroxide and Baking Soda
A concoction of hydrogen peroxide mixed with baking soda can work miracles for discoloured grout. Apply this fizzing mixture to the grout lines, let it bubble for a few minutes, and then scrub gently with a brush before rinsing.
This potent mixture can bring back the original brightness of your grout, especially if it’s white or light-coloured.
Method 6: Alkaline Cleaners
Grease, soap scum, and organic materials don’t stand a chance against alkaline cleaners. These powerful solutions can deeply clean your tiles and grout without harsh abrasives.
Apply according to the product’s directions, scrub gently to lift dirt and grime, and rinse well. It’s important to ensure the cleaner is safe for your specific type of tile.
Method 7: Professional Tile and Grout Cleaning Services
Sometimes, despite our best efforts, professional intervention is necessary. This is particularly true for stubborn stains or when dealing with delicate tiles that require expert care.
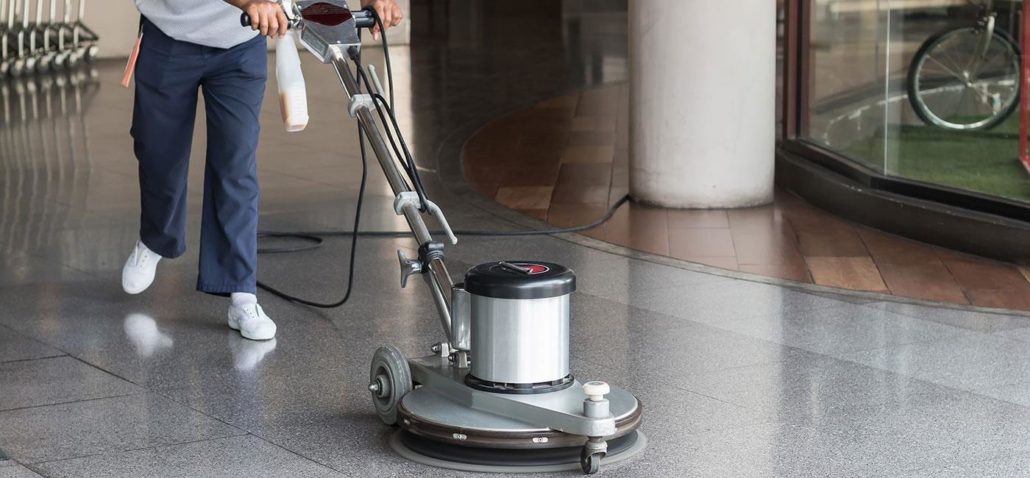
Professional tile cleaning Melbourne services have the specialised equipment and expertise to deeply clean tiles and grout without causing damage.
Choosing professional tile cleaning can also extend the life of your tiles and grout, making it a wise investment for the future.
Let’s Make Your Tiles Shine Again!
Keeping your tiles clean after grouting doesn’t have to be an overwhelming task. With the right approach and some dedication, you can maintain the beauty and integrity of your tiled surfaces.
From natural cleaning solutions like vinegar and baking soda to more robust methods like steam cleaning or professional services, there’s an option suited to every need and tile type.
If your inner voice insists that implementing these methods takes too much time, then perhaps it’s time to listen to it and consider hiring Total Floor Service for professional tile cleaning. Our team of expert cleaners specialises in tile cleaning, ensuring that your tiles are gleaming quickly.
Don’t let cleaning become a hassle – get our tile cleaning Melbourne service for efficient and effective results.
FAQs
Q: Can I use bleach to clean my grout?
A: While bleach can be effective at removing stains, it can also damage your tiles and grout if not used properly. It’s best to avoid using bleach unless specifically recommended by the manufacturer.
Q: How often should I clean my tiles after grouting?
A: The frequency of tile cleaning will depend on factors such as foot traffic and environmental conditions. In general, aim to clean your tiles at least once a month to prevent grime buildup.
Q: Will steam cleaning damage my tiles?
A: When used correctly, steam cleaning is safe for most types of tiles. However, it’s essential to follow the manufacturer’s instructions and avoid prolonged exposure to heat, which could potentially damage the tiles.
Q: Can I use vinegar on all types of tiles?
A: Vinegar is safe to use on most types of tiles, but it’s always best to test it in a small, inconspicuous area first to ensure compatibility. Avoid using vinegar on natural stone tiles, as it can etch the surface and cause damage.








 Address:
  Phone:
  ABN: 63 602 512 489


